Daniel Flefil
February 29, 2020 · 5 min read
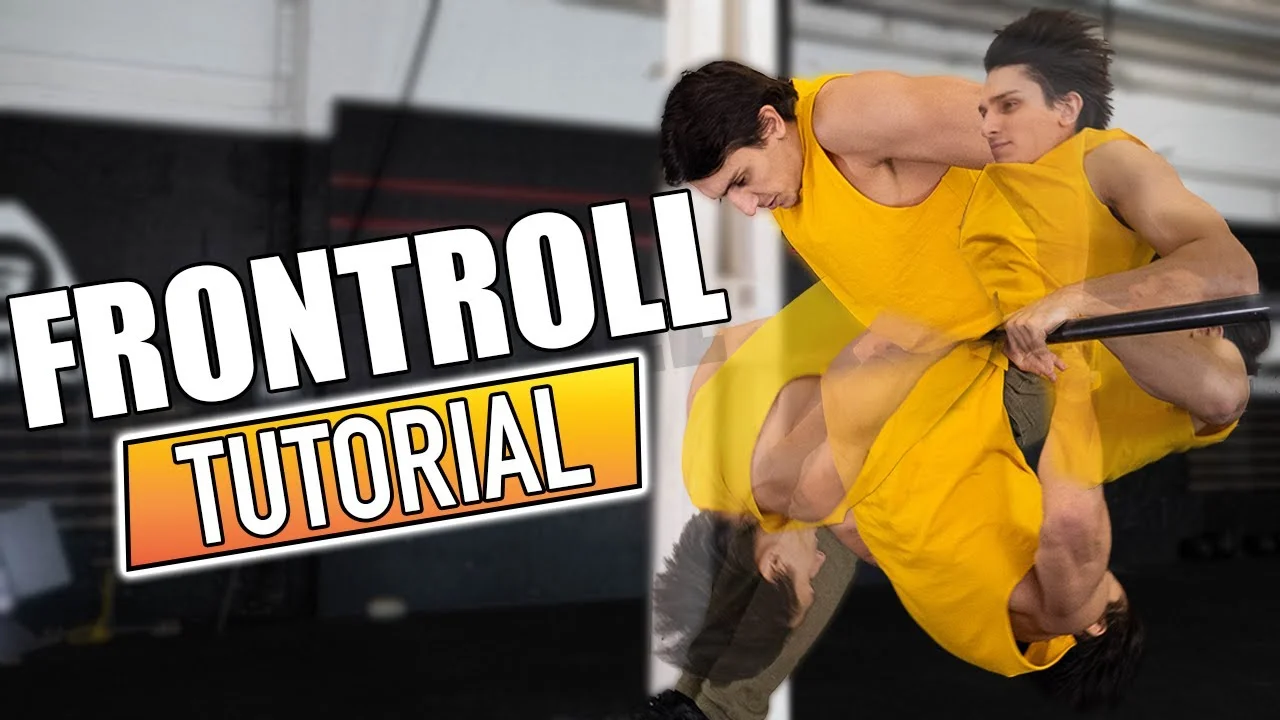
The front roll is a bar transition move that makes freestyle combinations smoother and faster. It is not a static skill. It is a dynamic transition used between moves to maintain flow and build speed going into the next element. The challenge is not strength. The bar position, the heel kick timing, and a hand twist most people miss are where the move either works or fails. In this tutorial I cover the prerequisites, the five technique steps for the low bar version, the easier elbow variation, and how to take the move to a high bar after a dynamic muscle up.
Watch the Full Tutorial
What Is the Front Roll?
The front roll is a bar movement where the athlete drives their upper body over the bar in a forward arc, rolling across the hips, then completing the rotation and returning to a support or hang position. In freestyle calisthenics and street workout, it appears in competition combinations as a connector between skills rather than a standalone move. The value is in what it enables: moving from one skill to the next while building rather than losing speed.
The move sits at a beginner to intermediate skill level. The physical demand is low. What matters is coordination: getting the dive, the heel kick, and the hand position right in the correct sequence. Athletes who can support themselves on a bar and have basic body control can start learning the front roll relatively quickly.
Prerequisites
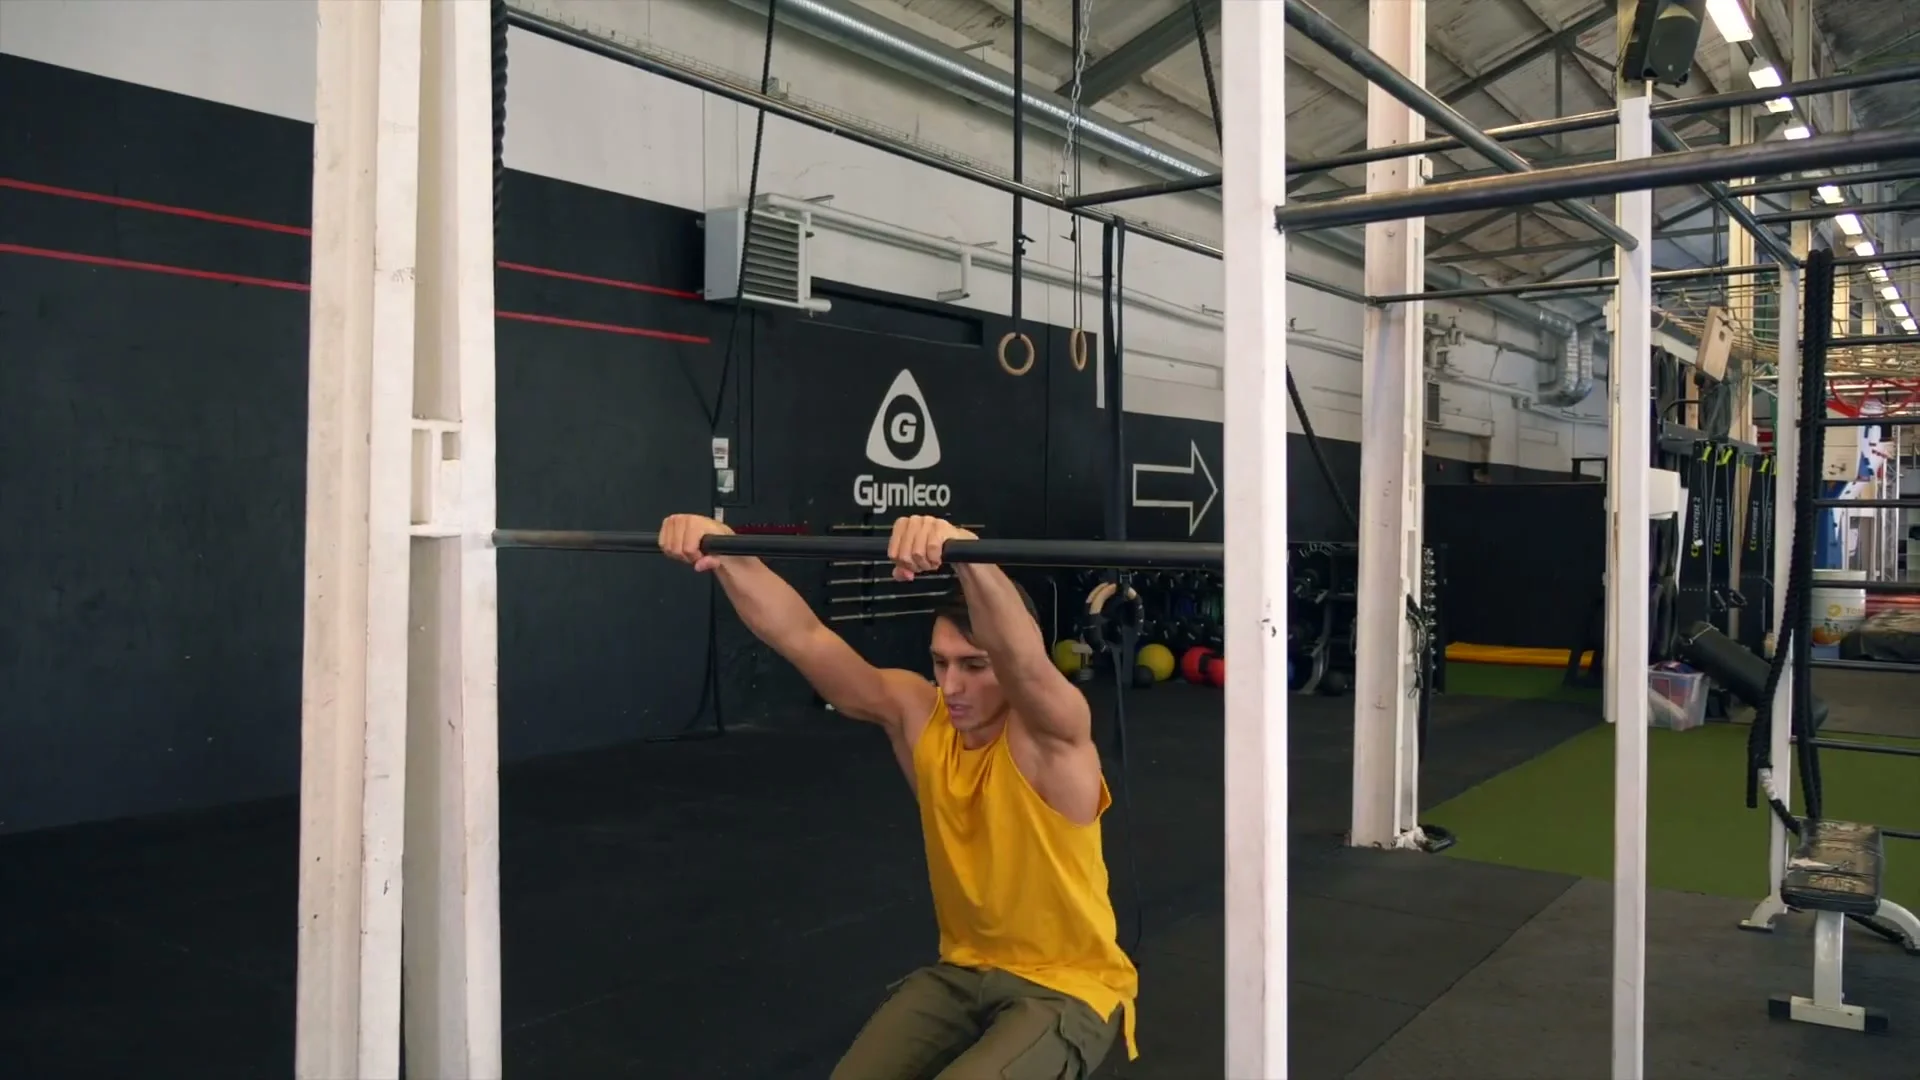
The front roll requires the ability to support yourself on a low bar and basic control of your body in the inverted position. No advanced pulling or pressing strength is needed. The primary requirement is being comfortable at the bar and able to get into a support position, either by jumping up or through a bar dip.
Specific standards before starting:
- Ability to hold a straight bar support position (arms locked out, body above bar)
- 3-5 straight bar dips
- Basic comfort hanging and swinging on a bar
Technique: How the Front Roll Works
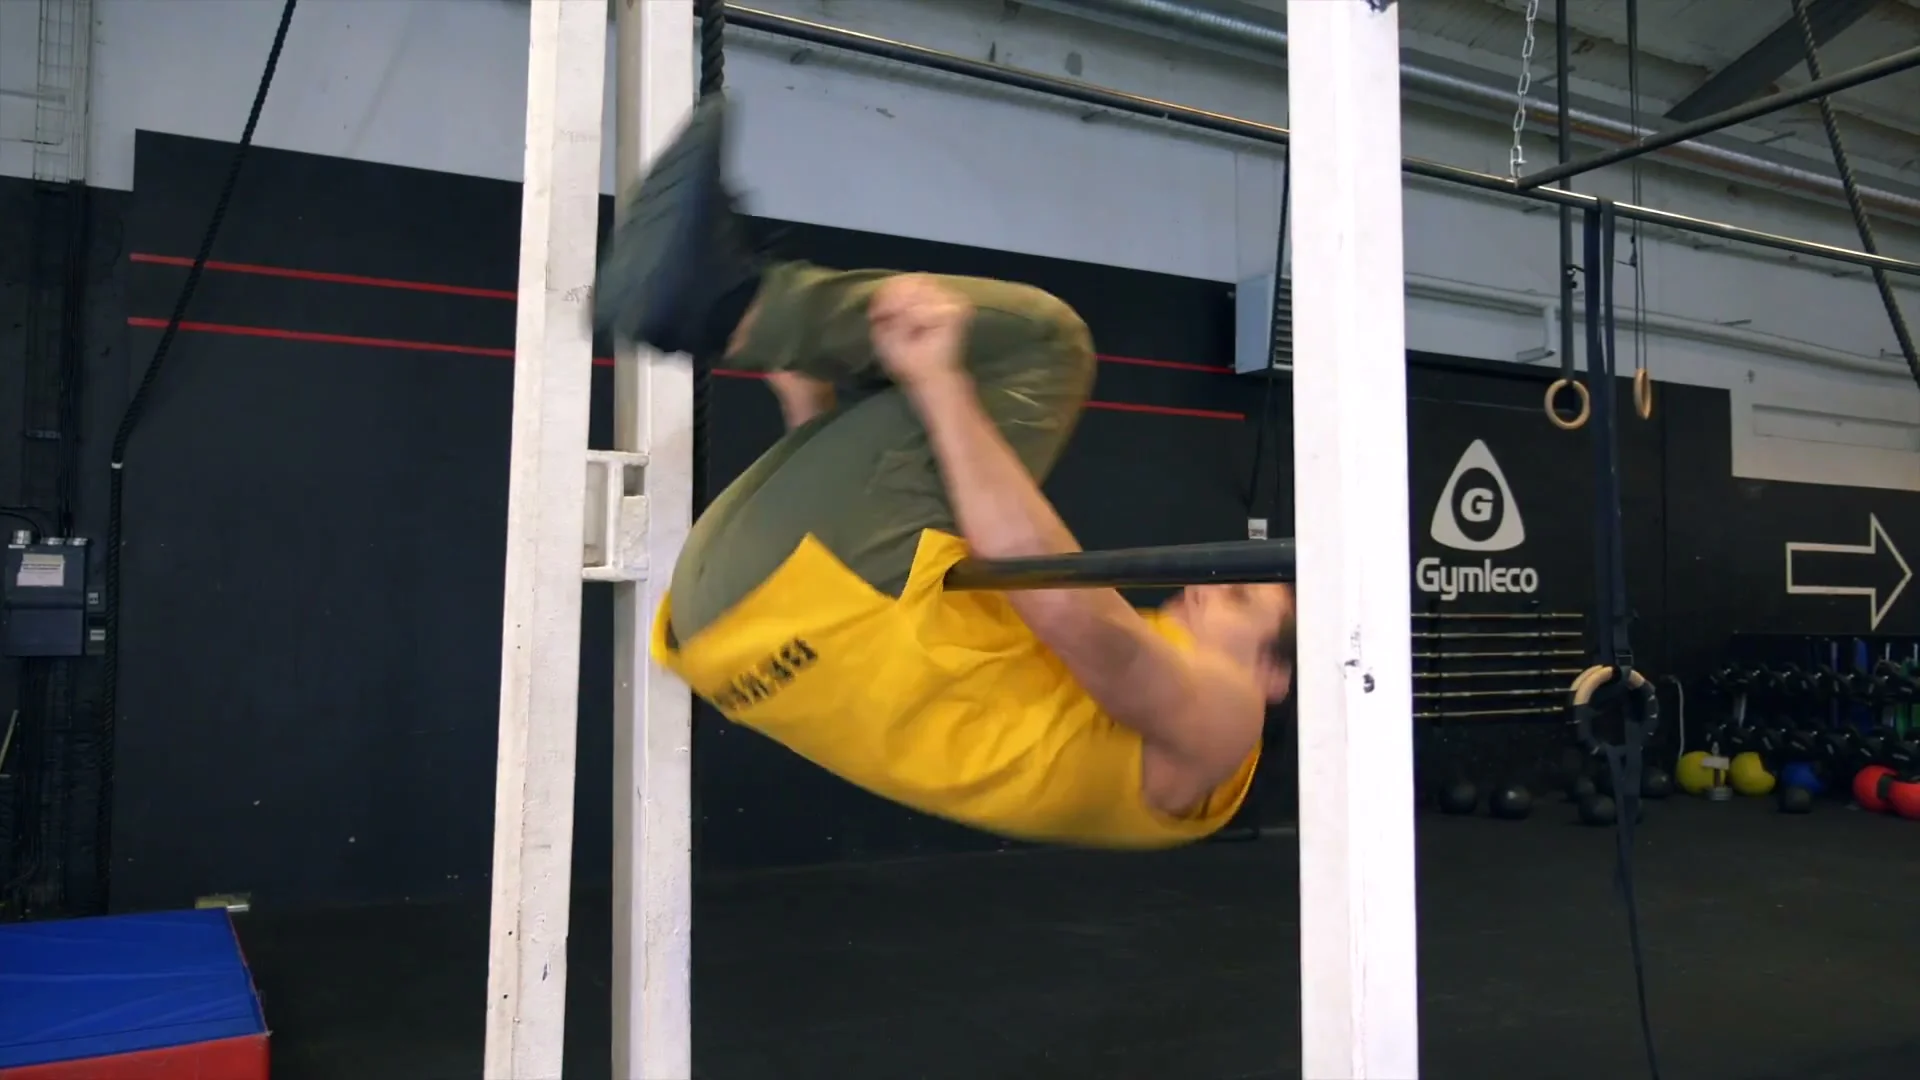
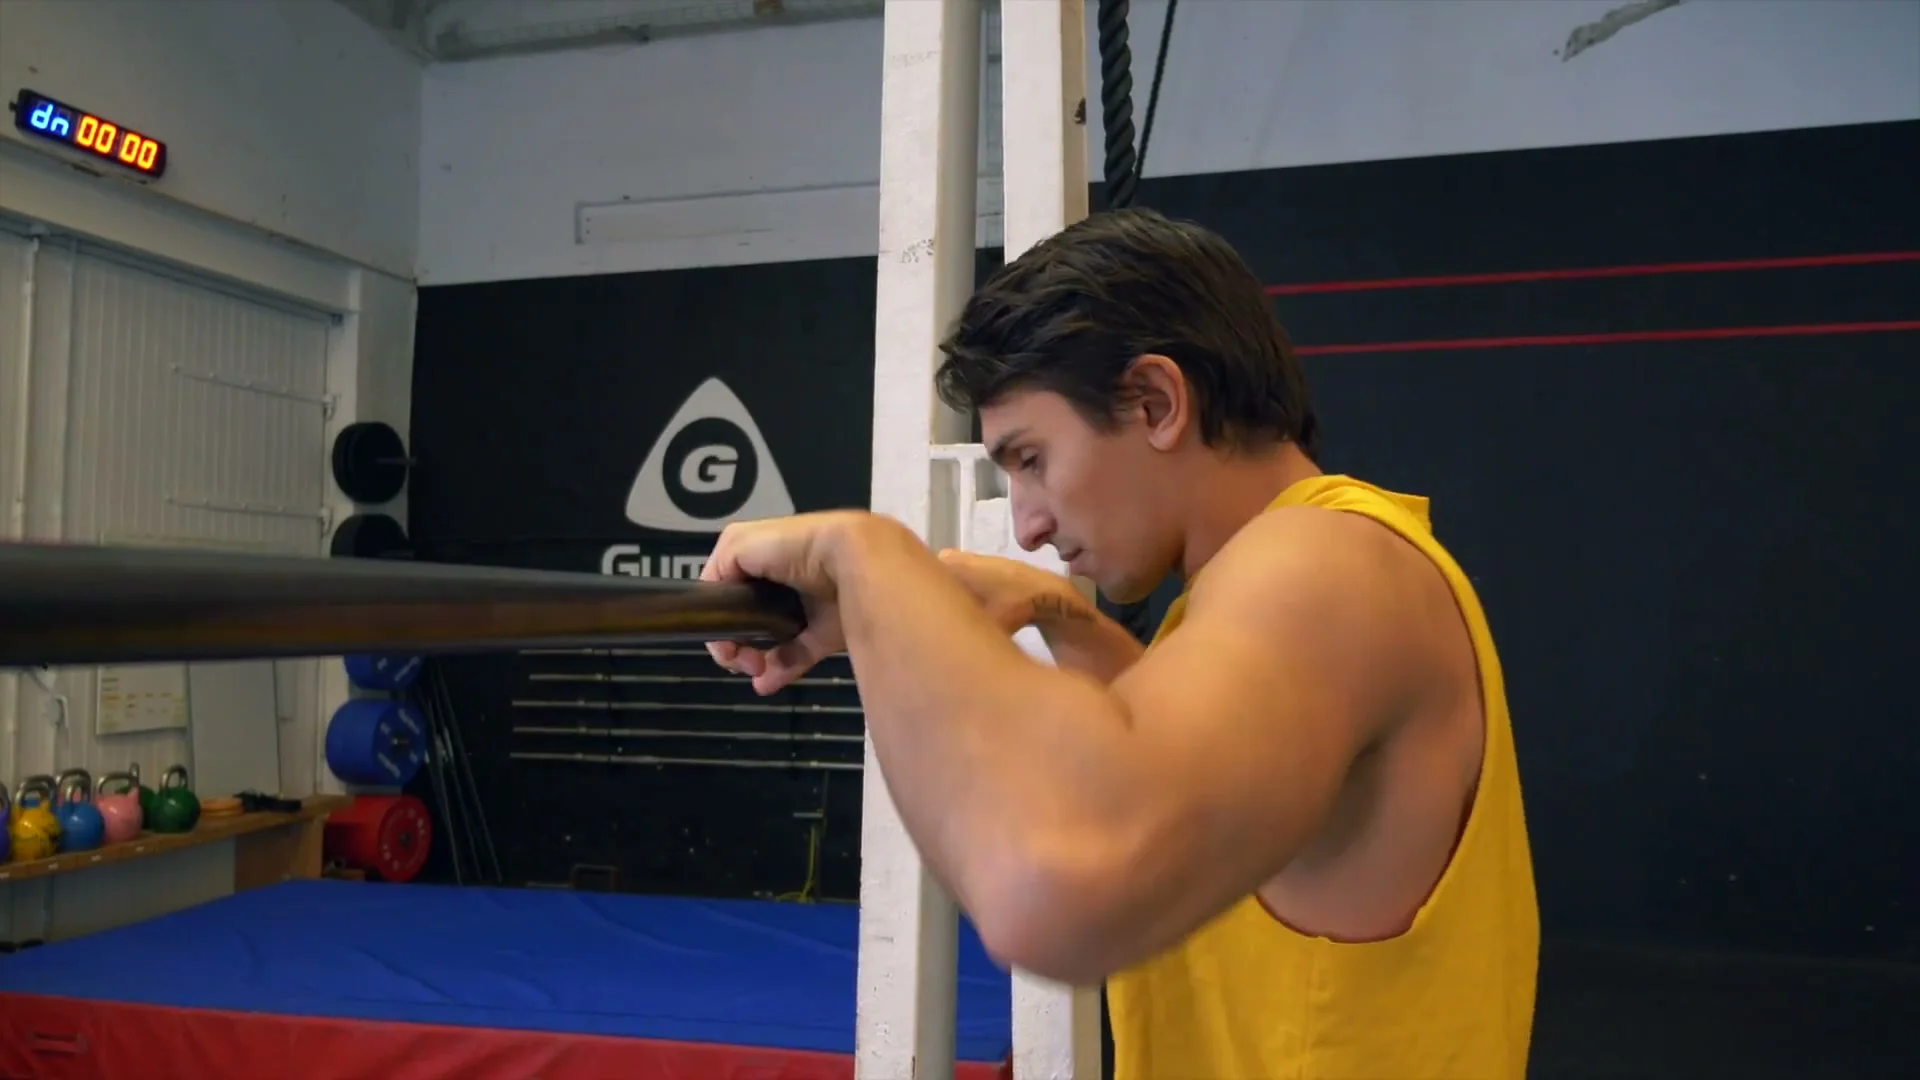
The front roll has three physical elements that must combine correctly. The first is hip placement. When you dive over the bar, the bar must land on the hips, not on the upper legs or stomach. Too low and the leverage is wrong. Too high and the rotation is blocked. The hips are the pivot point for the entire roll.
The second is the heel kick to the butt. This is what creates the speed and rotational power the move needs. Kicking the heels toward the butt while pushing the hips outward drives the legs over the bar. Without this kick, the roll stalls and requires arm strength to complete rather than momentum.
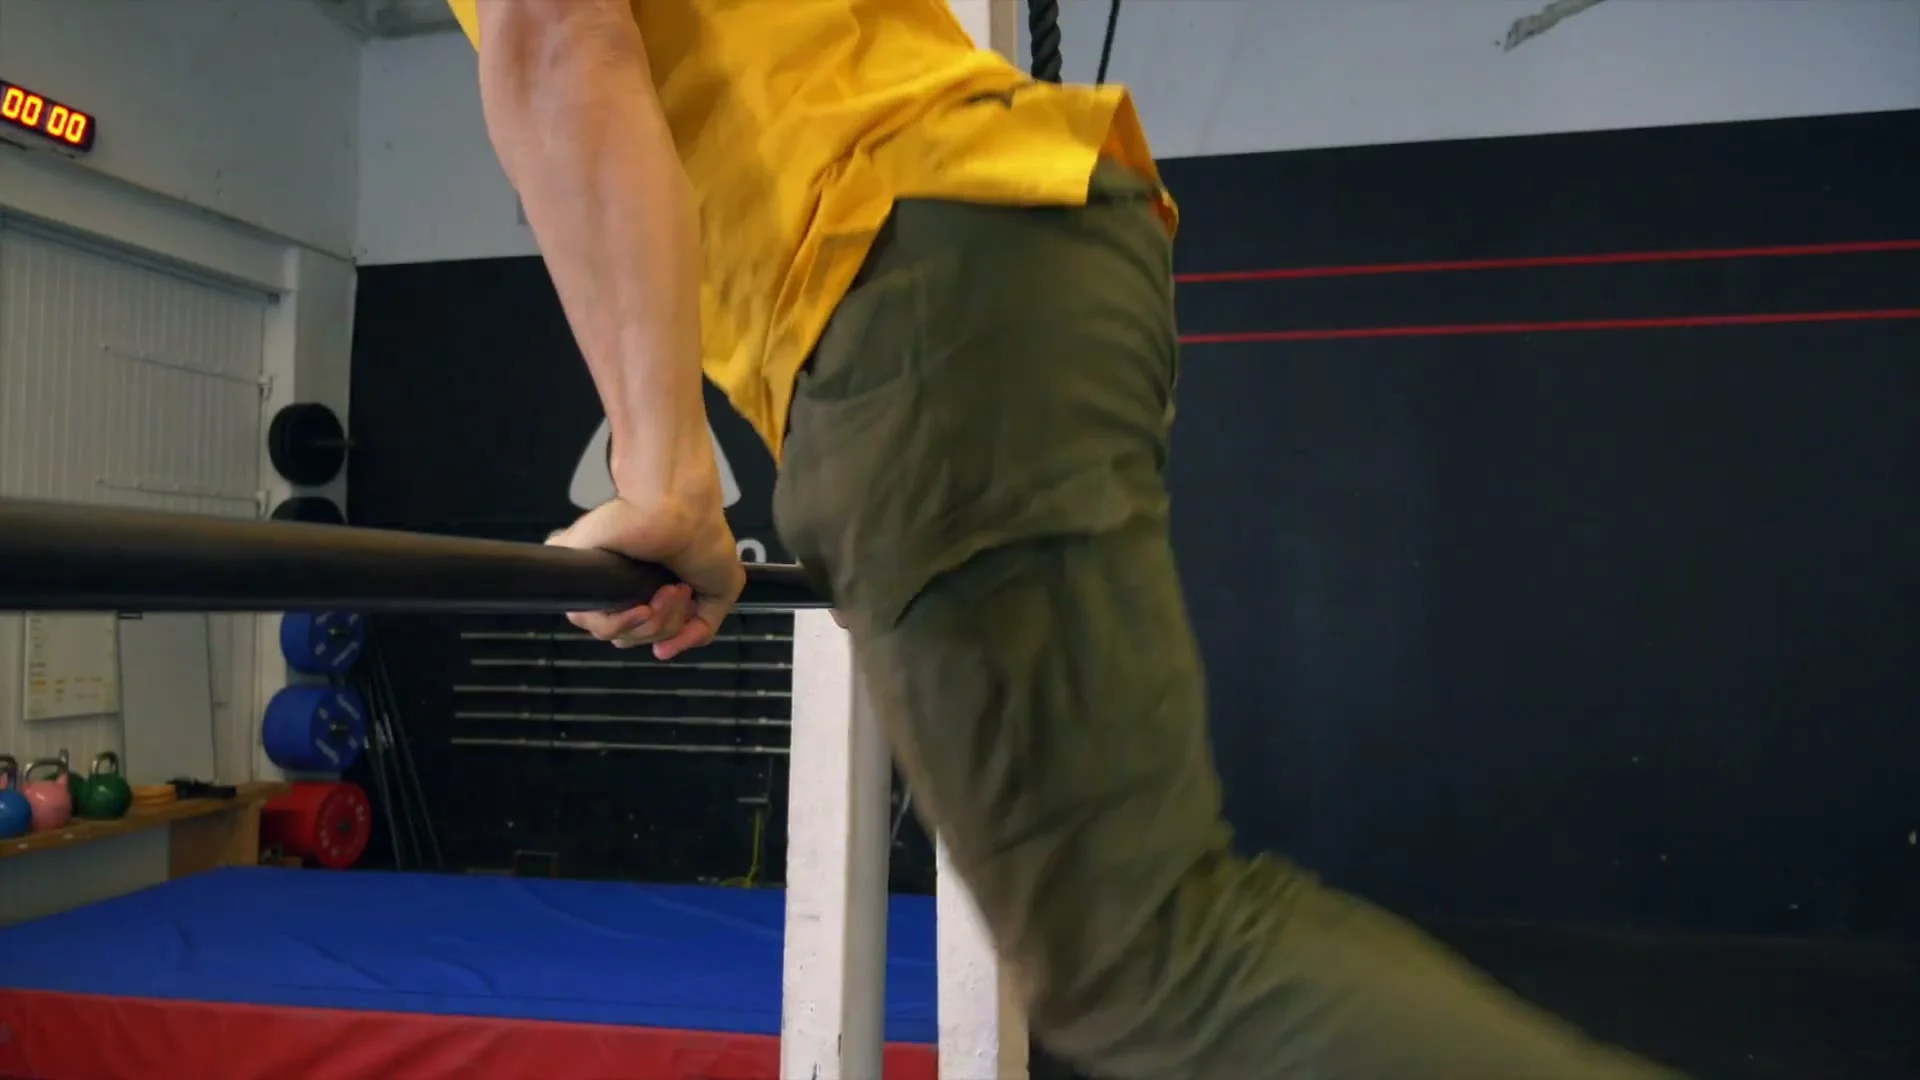
The third is the hand twist. After diving down, the hands must rotate forward toward a false grip position. This is the step where most athletes fail. The dive itself often looks right, but without the hand twist, the body cannot complete the rotation and gets stuck. Twisting the hands forward after the dive is what converts the downward arc into a completed front roll.
Key Takeaway
Progression: Training From Zero to Front Roll
Work through these stages in order on a low bar before adding the high bar version.
Stage 1: Dive With the Upper Body
Get on a low bar in the support position. From there, drive your upper body forward and down so the bar sits at the hip crease. Feel where the bar lands. It should be at the hips, not the thigh or abdomen. Practice getting into this position repeatedly until the hip contact point is consistent. This is the foundation for everything that follows.
Progress when the bar lands on the hips reliably every time and you can hold the inverted position briefly without tension.
Stage 2: Heel Kick to Butt

Practice kicking the heels toward the butt with a pushing outward motion from the hips. Feel how this creates power and speed. Then combine it with the bar: get into the inverted position and kick the heels in the same motion. The heel kick should happen simultaneously with the downward dive of the upper body, not after it.
Progress when you can feel the momentum the heel kick creates during the dive.
Stage 3: Combine Dive and Heel Kick
Put both elements together in one motion. As the upper body dives down, the heels kick to the butt at the same time. The legs going backward and the upper body going forward create the rotational momentum. At this stage, you do not need to complete the full roll. The goal is to feel the combined momentum before adding the hand twist.
Progress when the combined motion feels smooth and the hips consistently hit the correct position on the bar.
Stage 4: Twist the Hands Forward
After diving down and feeling the momentum, twist the hands forward on the bar. The hands rotate toward a false grip position: the wrists come over the bar rather than staying in the standard overhand position. Practice this as a deliberate slow action before doing it within the full movement. The hand twist must be consciously applied after every dive until it becomes automatic.
Progress when you can consistently twist the hands after the dive without losing grip or momentum.
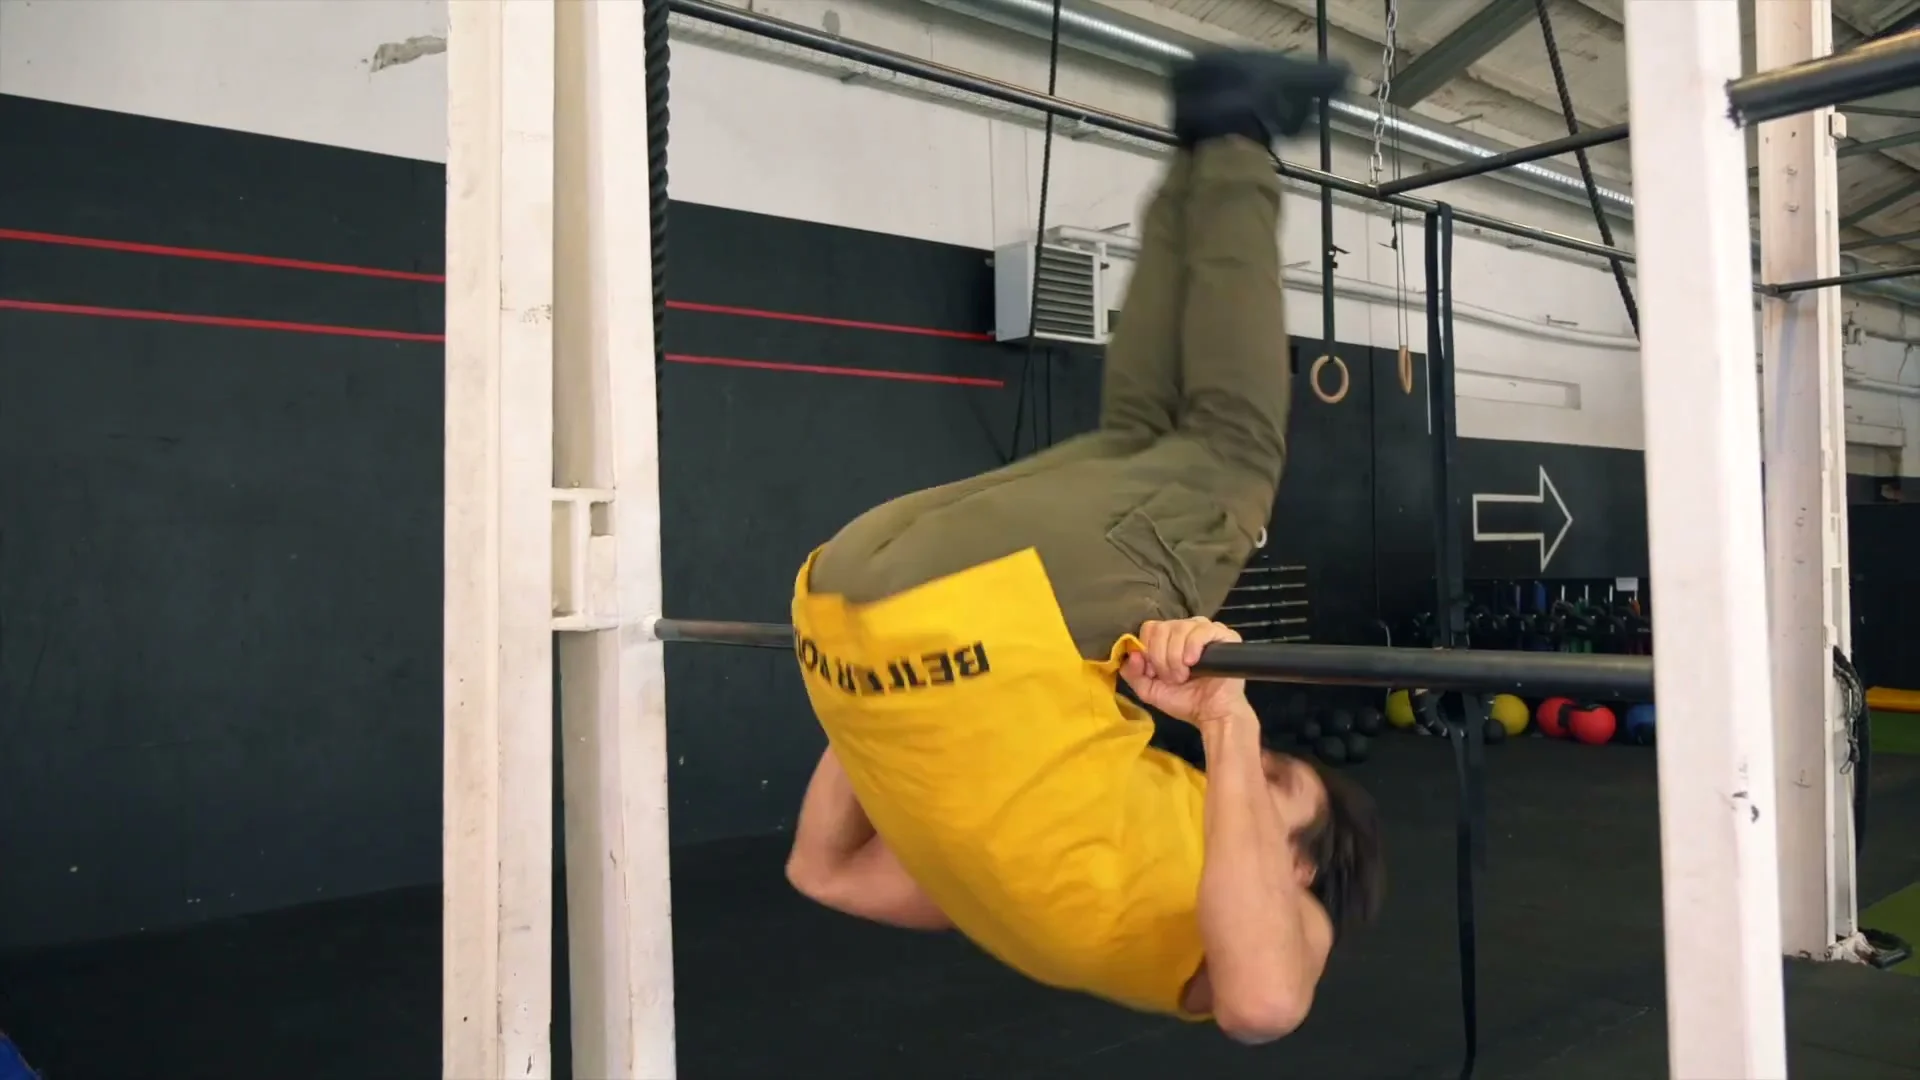
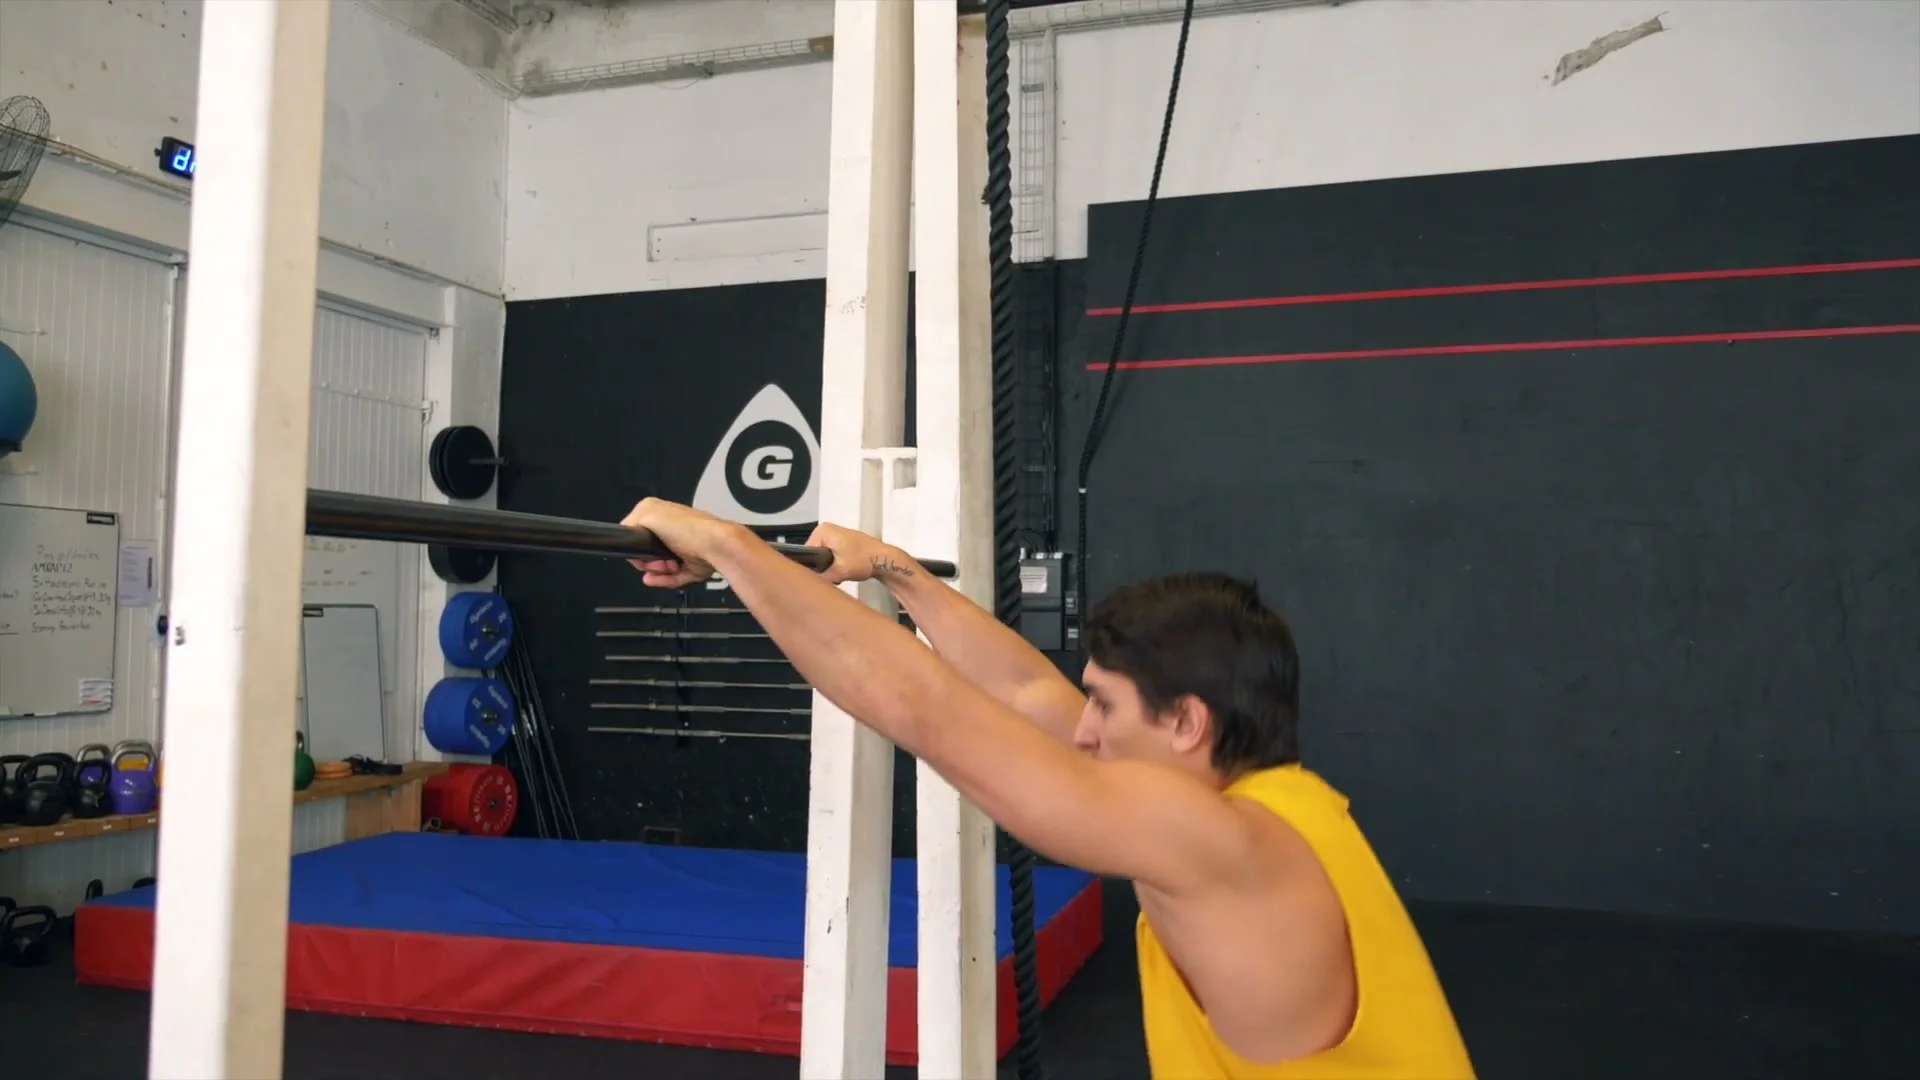
Stage 5: Lean Forward and Complete the Roll
With the hands twisted into position, lean the body weight forward over the bar. The legs must return back to the starting position to complete the move. This is the detail many people forget: if the legs do not come back down, the rotation stops halfway and the athlete gets stuck on the bar rather than completing the move. Keep the legs active through the entire finish.
Progress when the full rotation completes with the legs returning and the body arriving in a controlled finish position.
Stage 6: Elbow Variation
The elbow variation is an easier version for athletes who struggle with the hand recovery. The setup and dive are identical. The difference is when the body is fully inverted: release the hands and place the forearms on the bar instead. The shorter arm distance means the upper body does not need to travel as far to complete the rotation. The first attempts feel unfamiliar, but the mechanics are simpler once the forearm contact is made.
Stage 7: High Bar With Dynamic Muscle Up
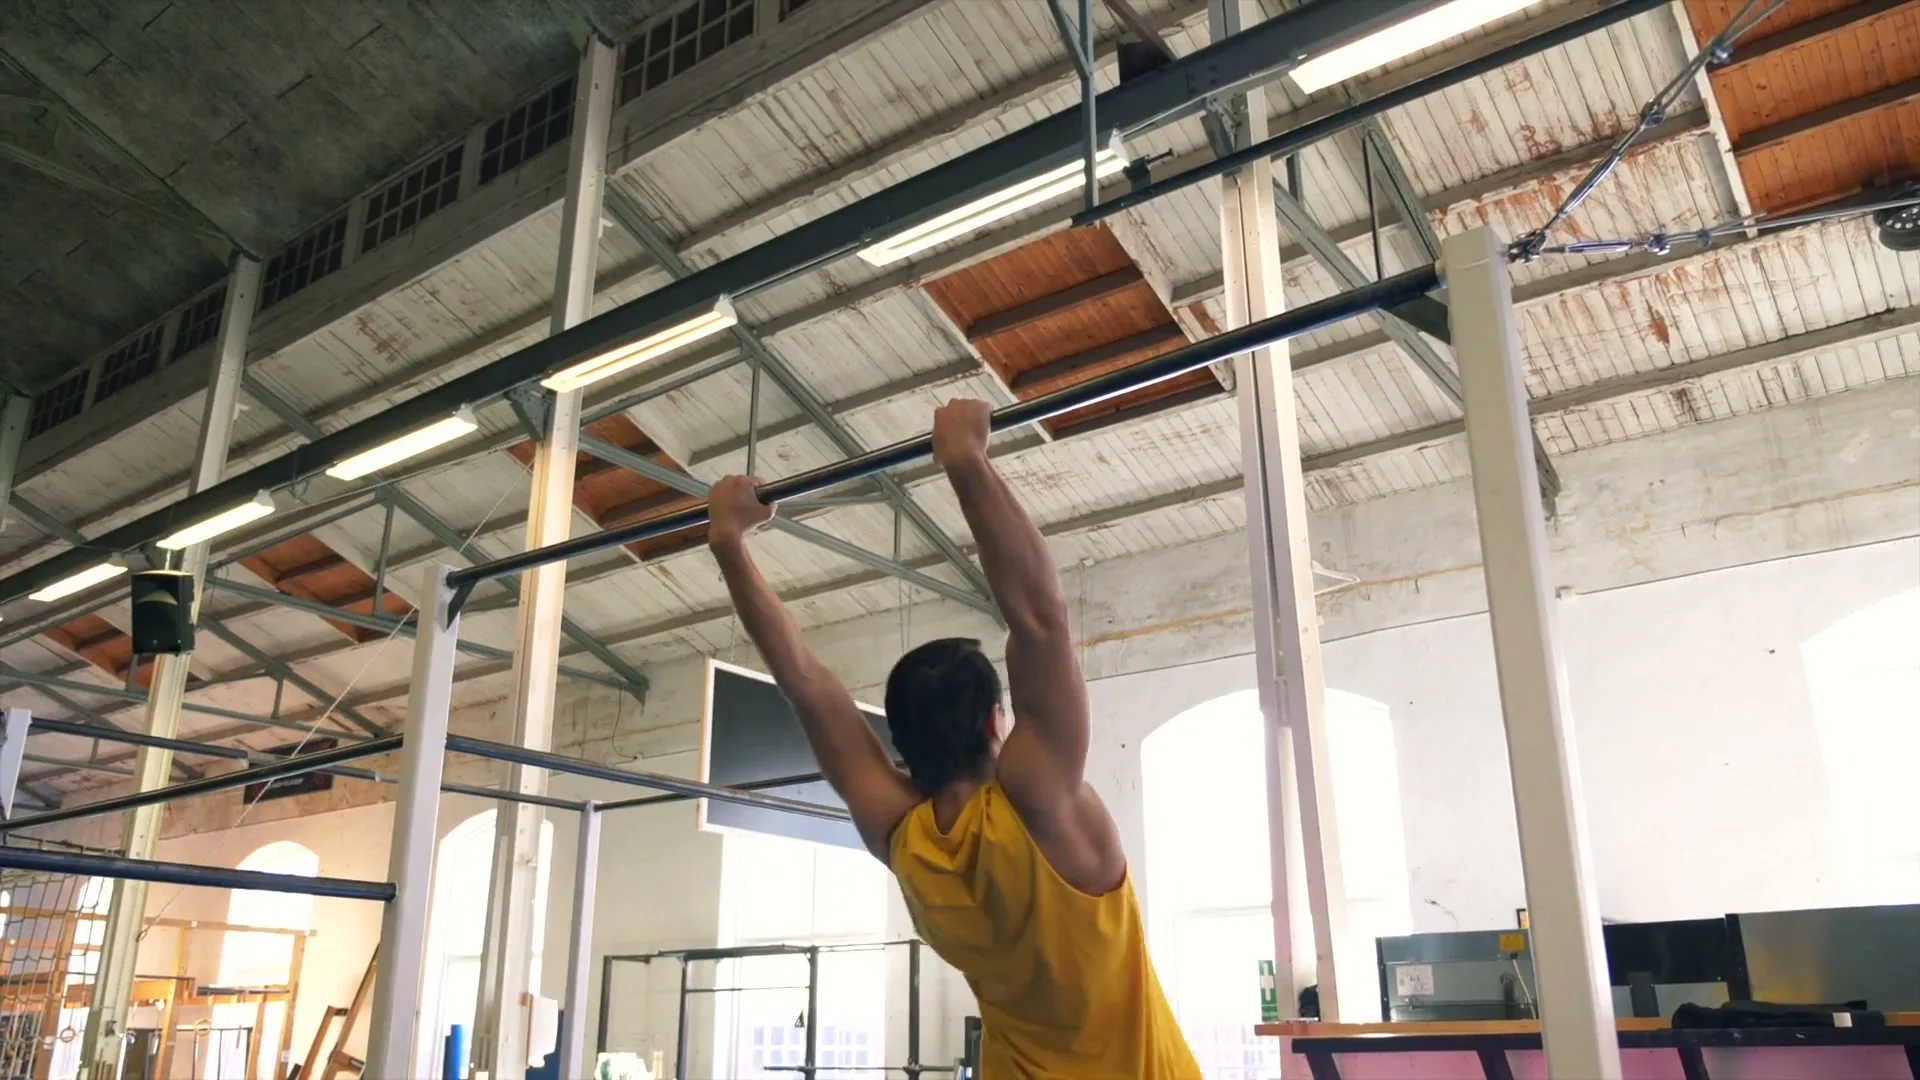
The high bar version adds a dynamic muscle up at the start. Do the muscle up, and the moment the chest clears the bar, dive immediately into the front roll. The legs start going back at the same time. Because the muscle up creates upward momentum, the transition into the dive must be immediate. There is no pause between the top of the muscle up and the dive. The combination takes several attempts to get smooth, but the technique is identical to the low bar version.
Common Mistakes
Bar Landing Too Low or Too High
If the bar lands below the hips on the upper thighs, the leverage is wrong and the rotation stalls. If it lands above the hips on the abdomen, the position is blocked. The hip crease is the precise contact point. Practicing stage 1 independently until this is automatic removes the problem before it affects later stages.
Forgetting to Twist the Hands
Attempting to complete the front roll without twisting the hands is the most common reason athletes get stuck. Without the hand twist toward the false grip position, the body cannot continue rotating over the bar. Every attempt should include a deliberate hand twist after the dive, even when slow at first.
Legs Not Returning to Starting Position
Not following through with the legs is the second most common failure. The legs must actively return to the starting position after the roll. If they stay behind the bar, the momentum is lost and the athlete ends up stuck across the bar rather than completing the move. Keep the leg drive active all the way through the finish.
Training Tips
Learn on a low bar before attempting the high bar version. The low bar allows practice of the full technique without the muscle up adding complexity. Work stages 1 through 5 on the low bar until the move is consistent before moving to a higher bar.
Film attempts from the side. The hip contact point, the hand twist, and the leg position on the way back are all difficult to feel accurately. A side-view recording shows immediately which stage is breaking down.
The elbow variation is worth learning even if the standard version comes first. It develops confidence in the inverted position and the forearm contact teaches how the rotation feels through the finish without the hand recovery challenge.
Add the front roll to combinations once it is consistent. A swing 360 into a front roll is one combination where both moves chain their momentum and neither interrupts the other. A consistent front roll is most useful in the context of the moves before and after it, not practiced in isolation.
Frequently Asked Questions About the Front Roll
What skill level is the front roll for?
Beginner to intermediate. The physical requirements are low: basic bar support and body control are enough to start. The learning curve is mainly coordination, not strength. Athletes who can hold a support position on a bar and have basic gym familiarity can work through the progression.
Do I need a muscle up to learn the front roll?
No. The low bar version is learned by jumping up to the support position. A muscle up is not needed until the high bar version is introduced. The full technique can be built and made consistent on a low bar before the muscle up is involved.
Why do I keep getting stuck on the bar during the front roll?
Getting stuck is almost always caused by not twisting the hands forward after the dive (stage 4) or not bringing the legs back to the starting position (stage 5). Film a side-view attempt to see which one is failing. The hand twist is the more common of the two.
Is the elbow variation easier than the standard version?
Yes. The elbow variation shortens the arm distance and reduces how far the upper body must travel to complete the rotation. It is a good variation for athletes who have the dive right but cannot complete the hand recovery. Once the elbow version is consistent, the hand version usually follows.
How long does it take to learn the front roll?
Most athletes with basic bar experience can get their first completed front roll in one to three sessions by following the five stages in order. The coordination clicks faster when the stages are practiced individually before being combined. Making the move smooth and consistent in combinations takes more time, typically a few weeks of regular practice.
What combinations work well with the front roll?
The front roll connects well after muscle ups, swing 360s, and any move that finishes in a support position. It is most effective when the move before it generates upward or forward momentum that the front roll can continue. I use it after a swing 360 as a combination where both moves flow without a reset.
Can the front roll be done on a standard pull-up bar?
Yes. Any bar with enough clearance around it works. The bar height should allow the hip position to be accessible when jumping to the support position. A bar at roughly chest to shoulder height is ideal for learning the low bar version.
Daniel Flefil
Calisthenics coach with 11 years of experience, co-founder of Calixpert, and organizer of Beast of the Barz, one of the world's largest calisthenics competitions. Based in Stockholm. I write about training, equipment, and everything that goes into building a serious calisthenics practice.
More about Daniel →