Daniel Flefil
October 16, 2024 · 10 min read
The front lever is one of the most respected skills in calisthenics, and it is also one of the most misunderstood when it comes to training it efficiently. Most athletes waste months on progressions that do not transfer, miss key activation patterns, and develop habits that corrupt their form later. I brought Nathan Bosech, an elite calisthenics athlete, back on the channel to give you the six tips he actually uses to build and teach the front lever. In this tutorial I cover scapular activation, lat engagement, grip choices, which progressions to use and which to skip, negatives, raises, and the breathing technique that changes everything for front lever pull-ups. By the end, you will know exactly what to train and in what order, no matter where you are starting from.
Watch the Full Tutorial
What Is the Front Lever?
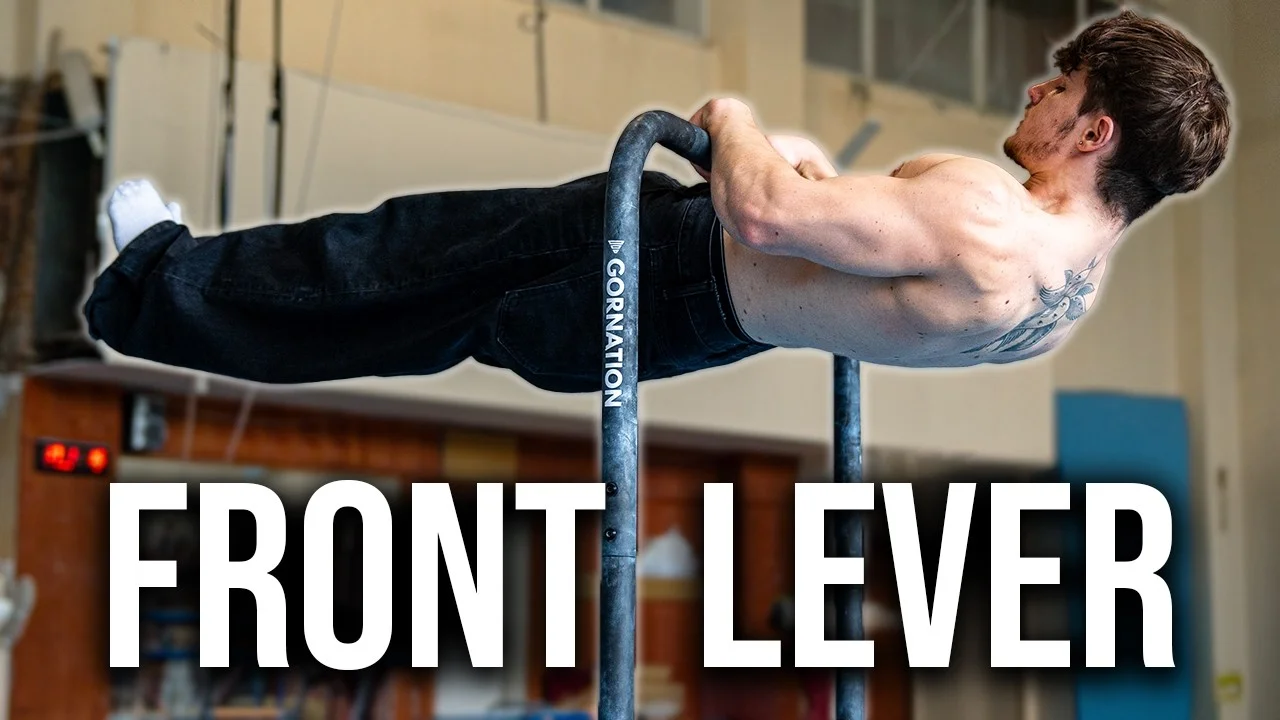
The front lever is a static hold performed hanging from a bar or rings. The body is held horizontal and perfectly straight, arms fully extended, facing up toward the sky. From the outside, the athlete appears to float parallel to the ground with no visible support other than the grip.
The movement demands high lat strength, full scapular retraction, core tension from chest to toes, and shoulder stability under a horizontal load. It sits in the advanced category of calisthenics holds, above the tuck front lever and one-leg front lever but below the front lever pull-up and front lever to touch in terms of difficulty.
Athletes pursue the front lever because it builds serious pulling strength, trains the lats in a stretched and loaded position, and looks striking. It also transfers directly to other skills including the planche, muscle-up, and iron cross.
Prerequisites
Before working toward a front lever you need a solid foundation in hanging strength and scapular control. If you cannot hang from a bar and control your scapulas both retracted and protracted, the front lever will not click no matter how many attempts you do. Nathan recommends being able to hold a dead hang for at least 30 seconds, perform 8 to 10 clean pull-ups, and feel your lats engage when you retract your shoulder blades. You also need basic core tension: a 30-second hollow body hold is a reliable minimum standard. Without these foundations, start there first.
Technique: How to Do the Front Lever
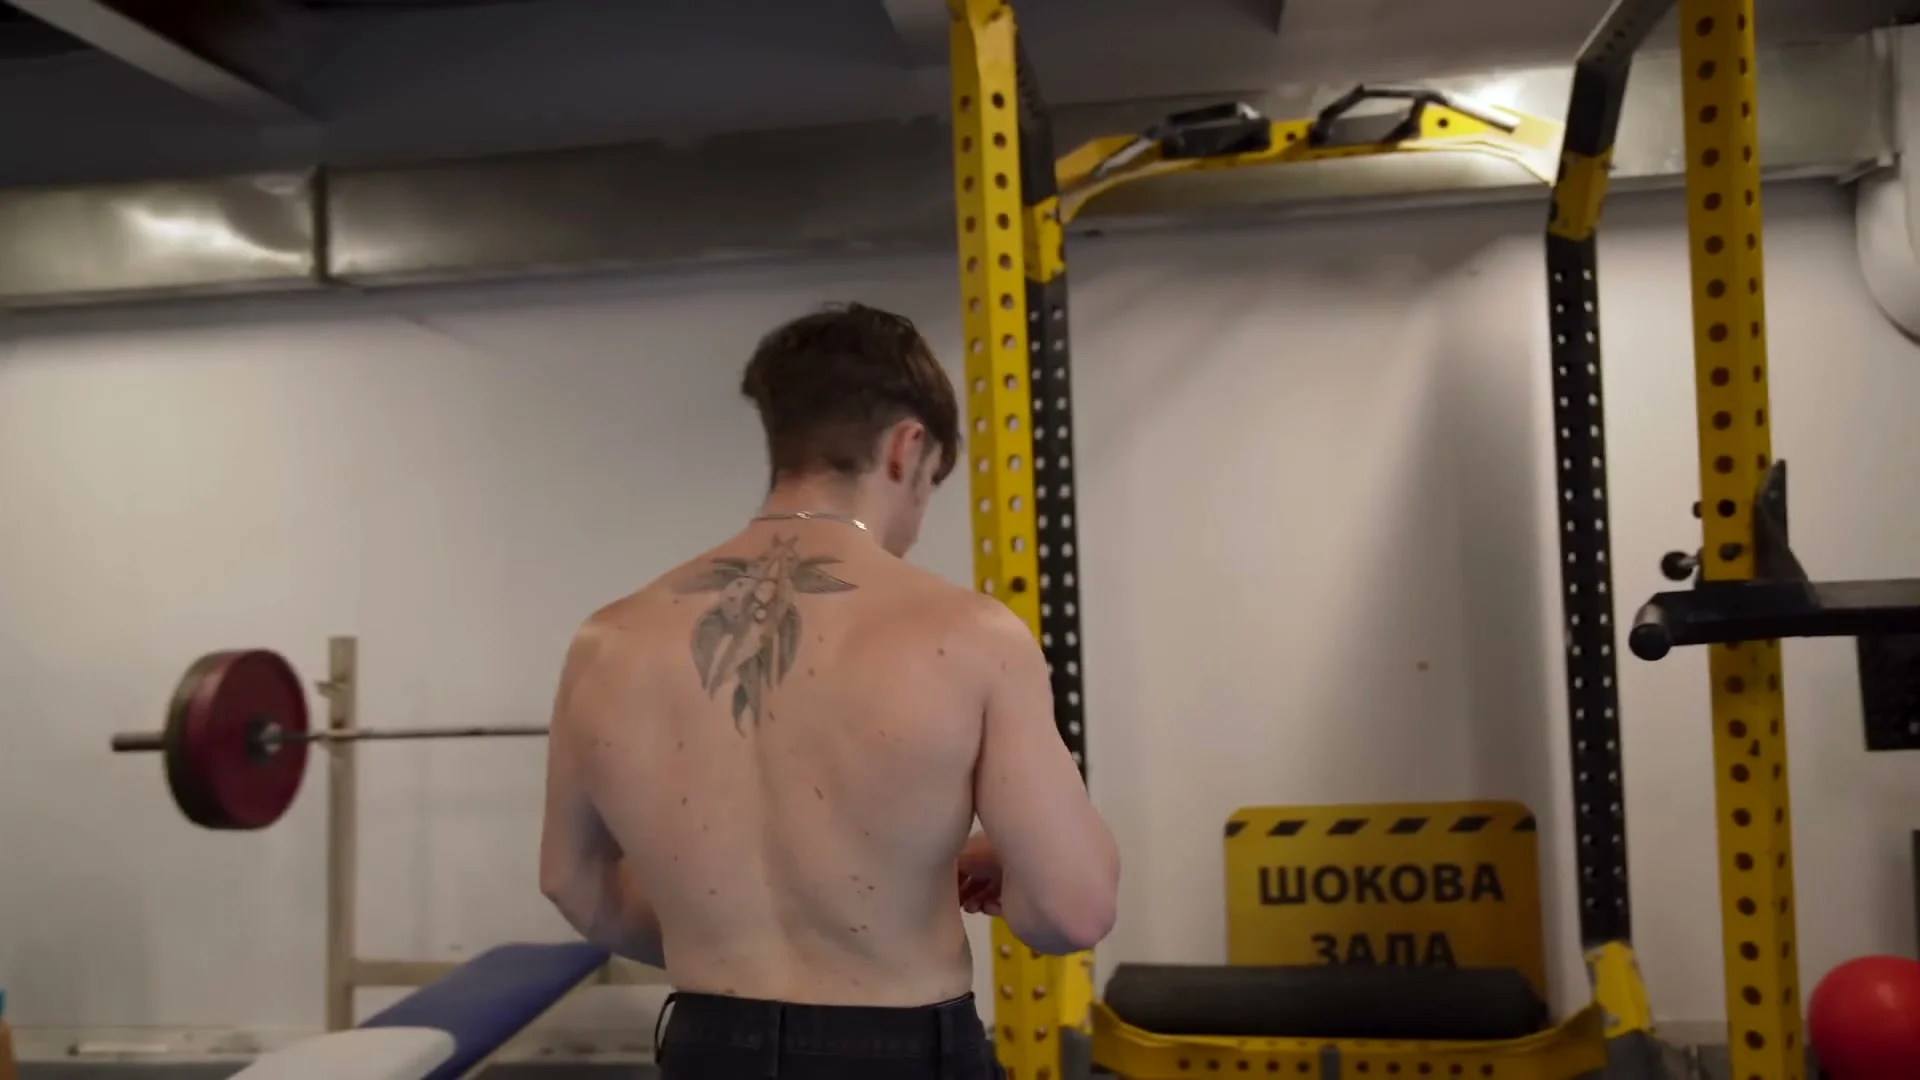
Keep your grip at shoulder width or slightly narrower. Retract your scapulas fully before initiating the hold. As you come to horizontal, keep your body in one rigid line from shoulders to toes: do not arch, do not pike, do not let the hips drop. Activate your quads actively to keep the legs straight and prevent the posterior chain from pulling the knees into a bend. Keep your arms straight throughout.
The lat activation is the central cue. Think of pushing the bar away from your hips in a downward arc, as if you are trying to bring the bar toward your thighs. That pressing motion generates the lat tension that holds the body horizontal.
Breathe in at the moment of the hold. Inhaling opens the chest, which triggers your chest muscles to stretch and your upper back to retract. A retracted back is a stronger front lever back. Exhaling and tensing does the opposite: it rounds the upper back and collapses the position.
The 6 Tips from Nathan Bosech
Tip 1: Scapular Retraction at the Bar
Hang from the bar, stay static, and inhale. Retract your scapulas as hard as you can and hold for a moment. Release and repeat for several small reps. What you want to feel is a deep squeeze in the lats, as if you are trying to push the bar downward in a forward arc.
This is both a warmup drill and a diagnostic. If you cannot feel the lats engage during this movement, you are not yet activating the muscles that the front lever requires. Nathan uses this as a standard pre-training warmup for every front lever session.
Key Takeaway
Tip 2: Elastic Band Lat Activation
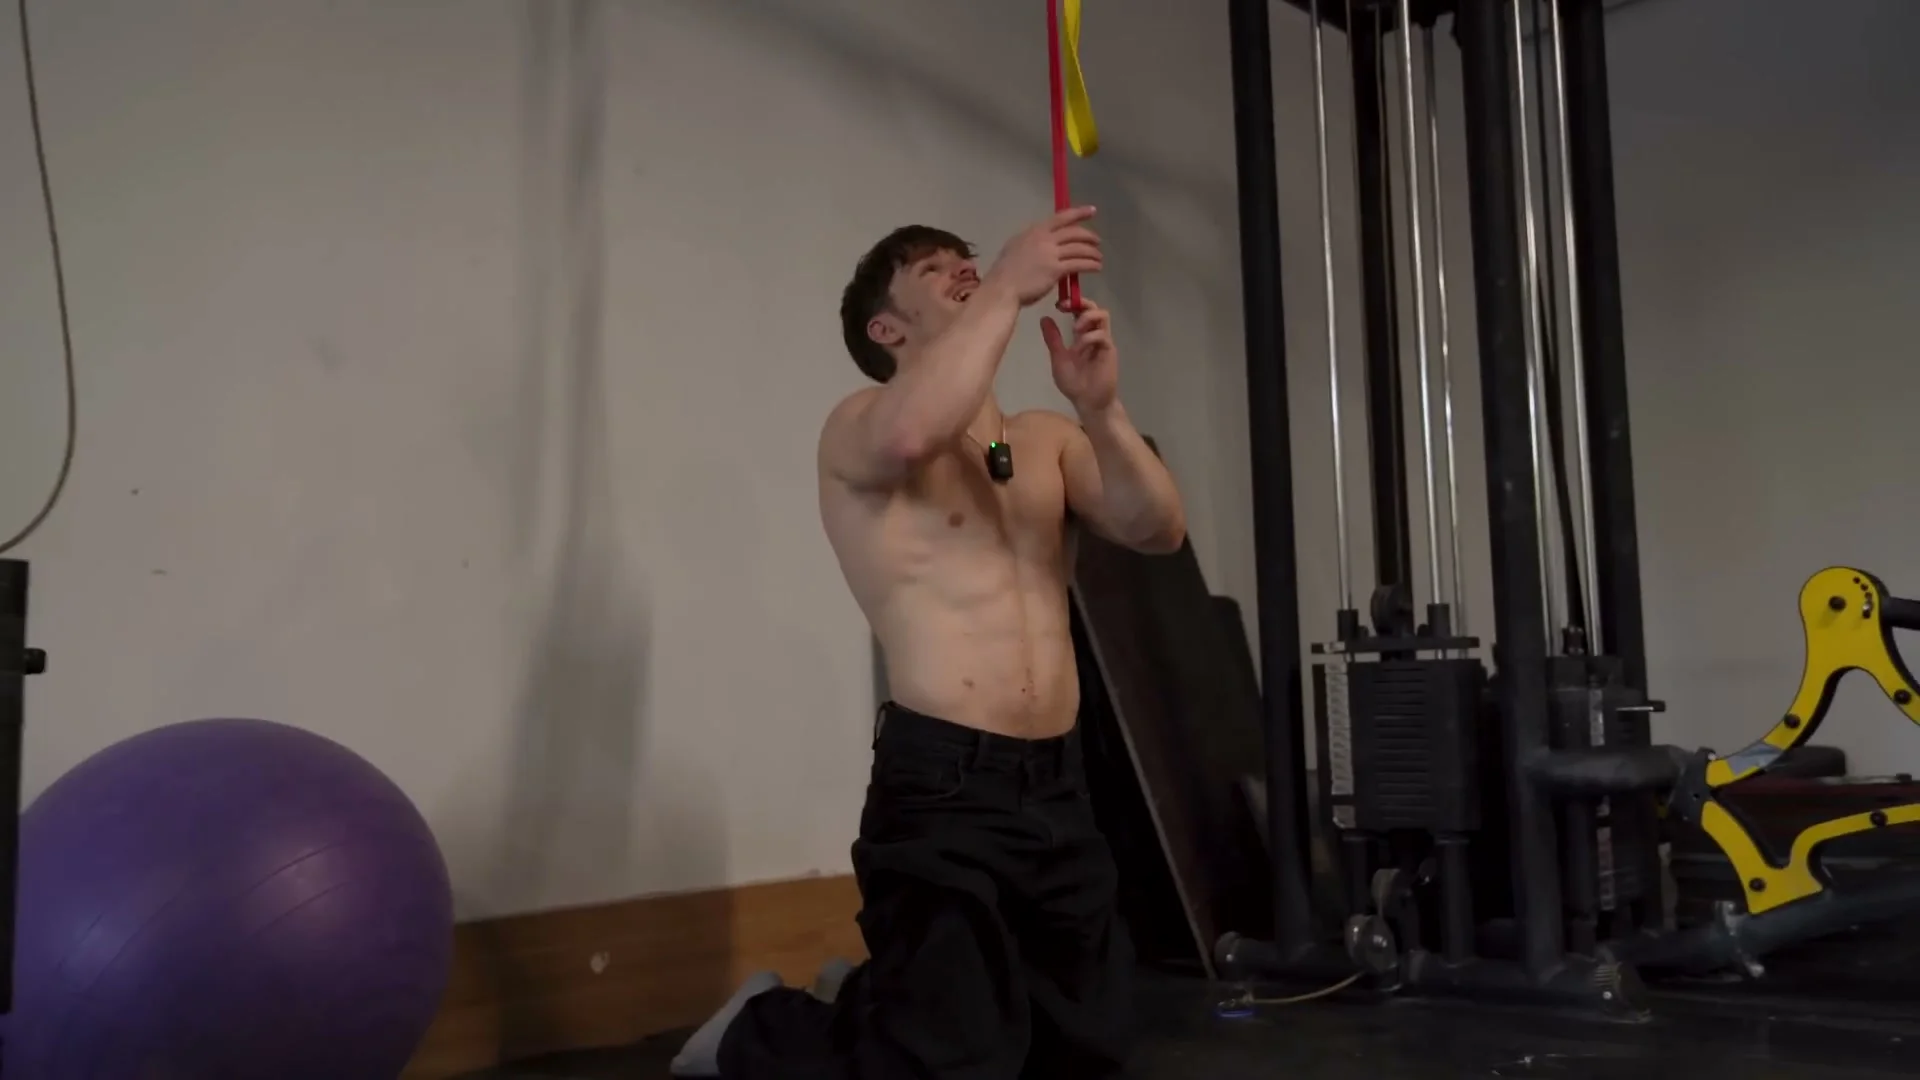
Loop a resistance band over the pull-up bar. Kneel on the floor below the bar, hold the band with both hands, and let your scapulas rise fully. From there, retract and pull down. That is the exact lat path of the front lever, just on a different axis.
Progress the drill by taking the band attachment point higher on the bar, which increases the resistance angle. Add a second band when the first becomes too easy. If you train in a gym without bands, the cable pulley with a rope attachment does the same movement pattern.
Nathan calls this the most underused front lever drill. The motion it trains is precisely what your lats need to learn before they can hold a full front lever under bodyweight.
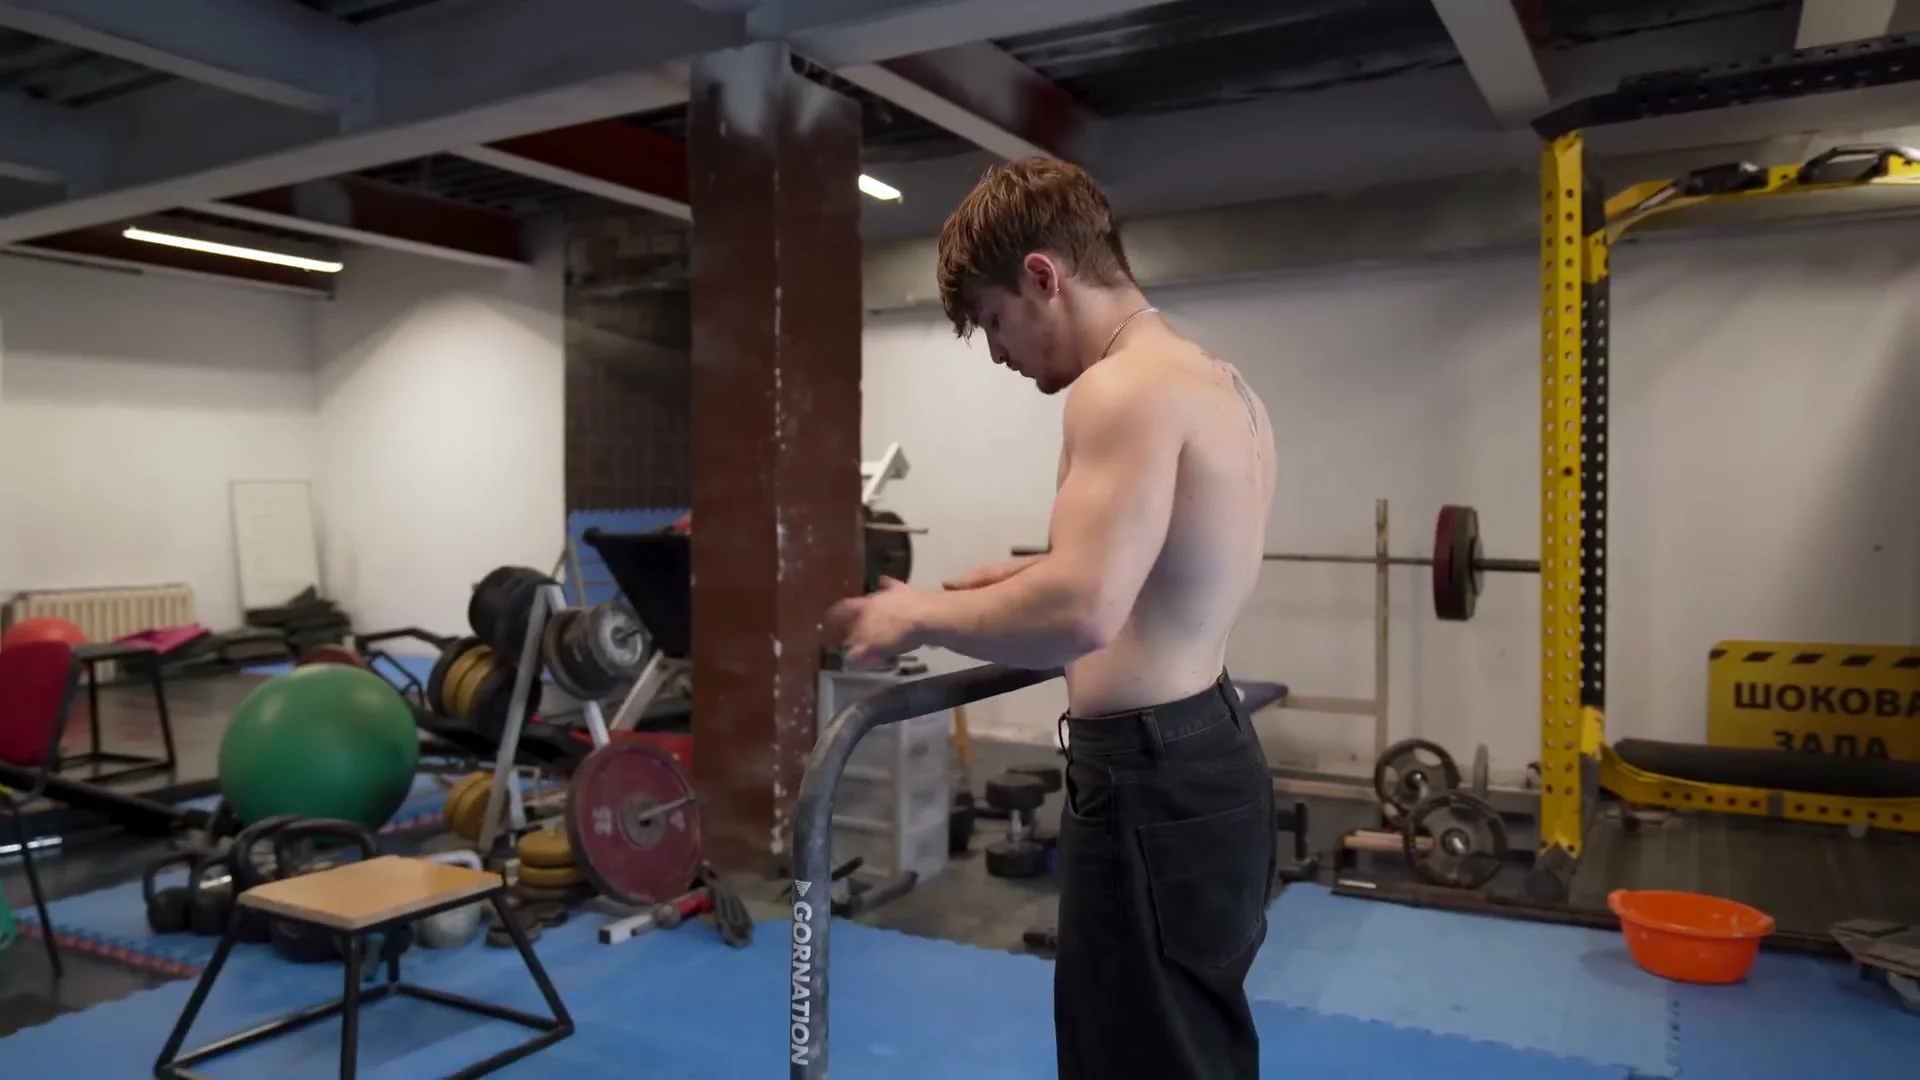
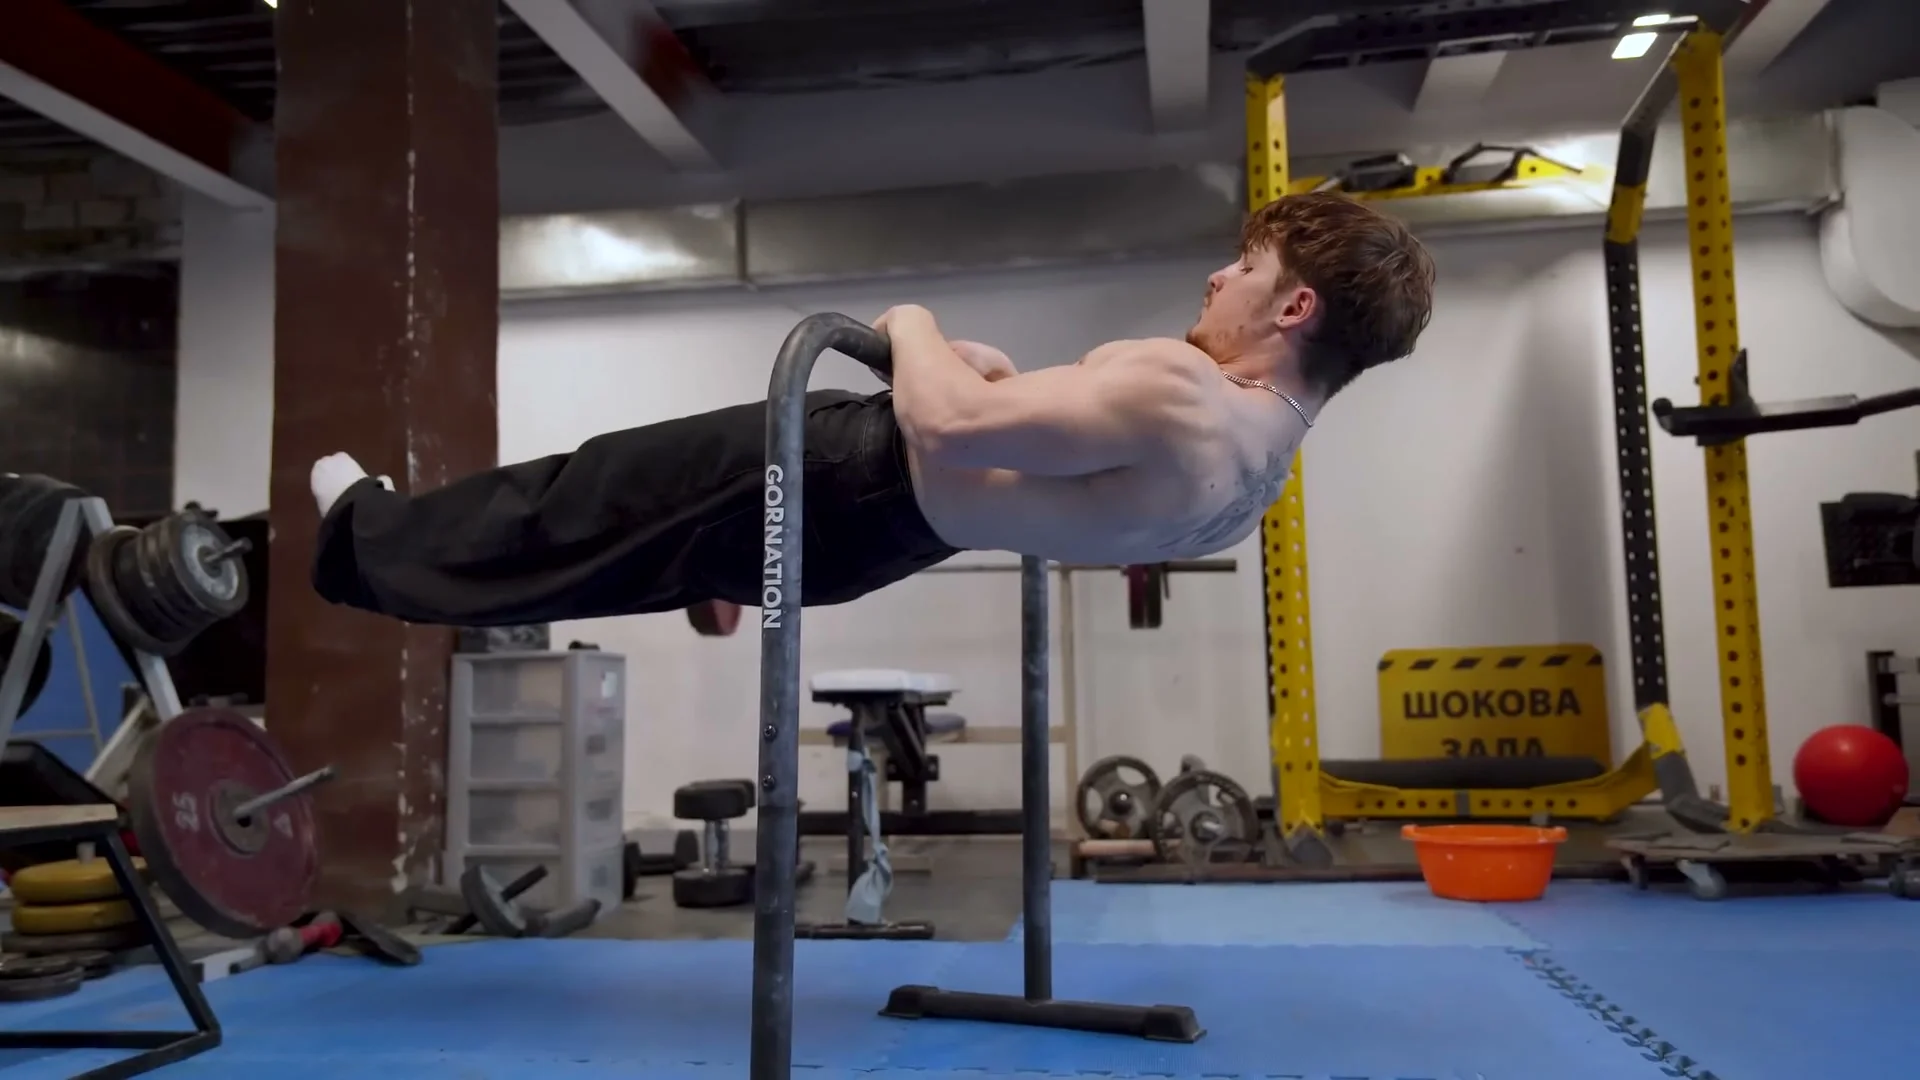
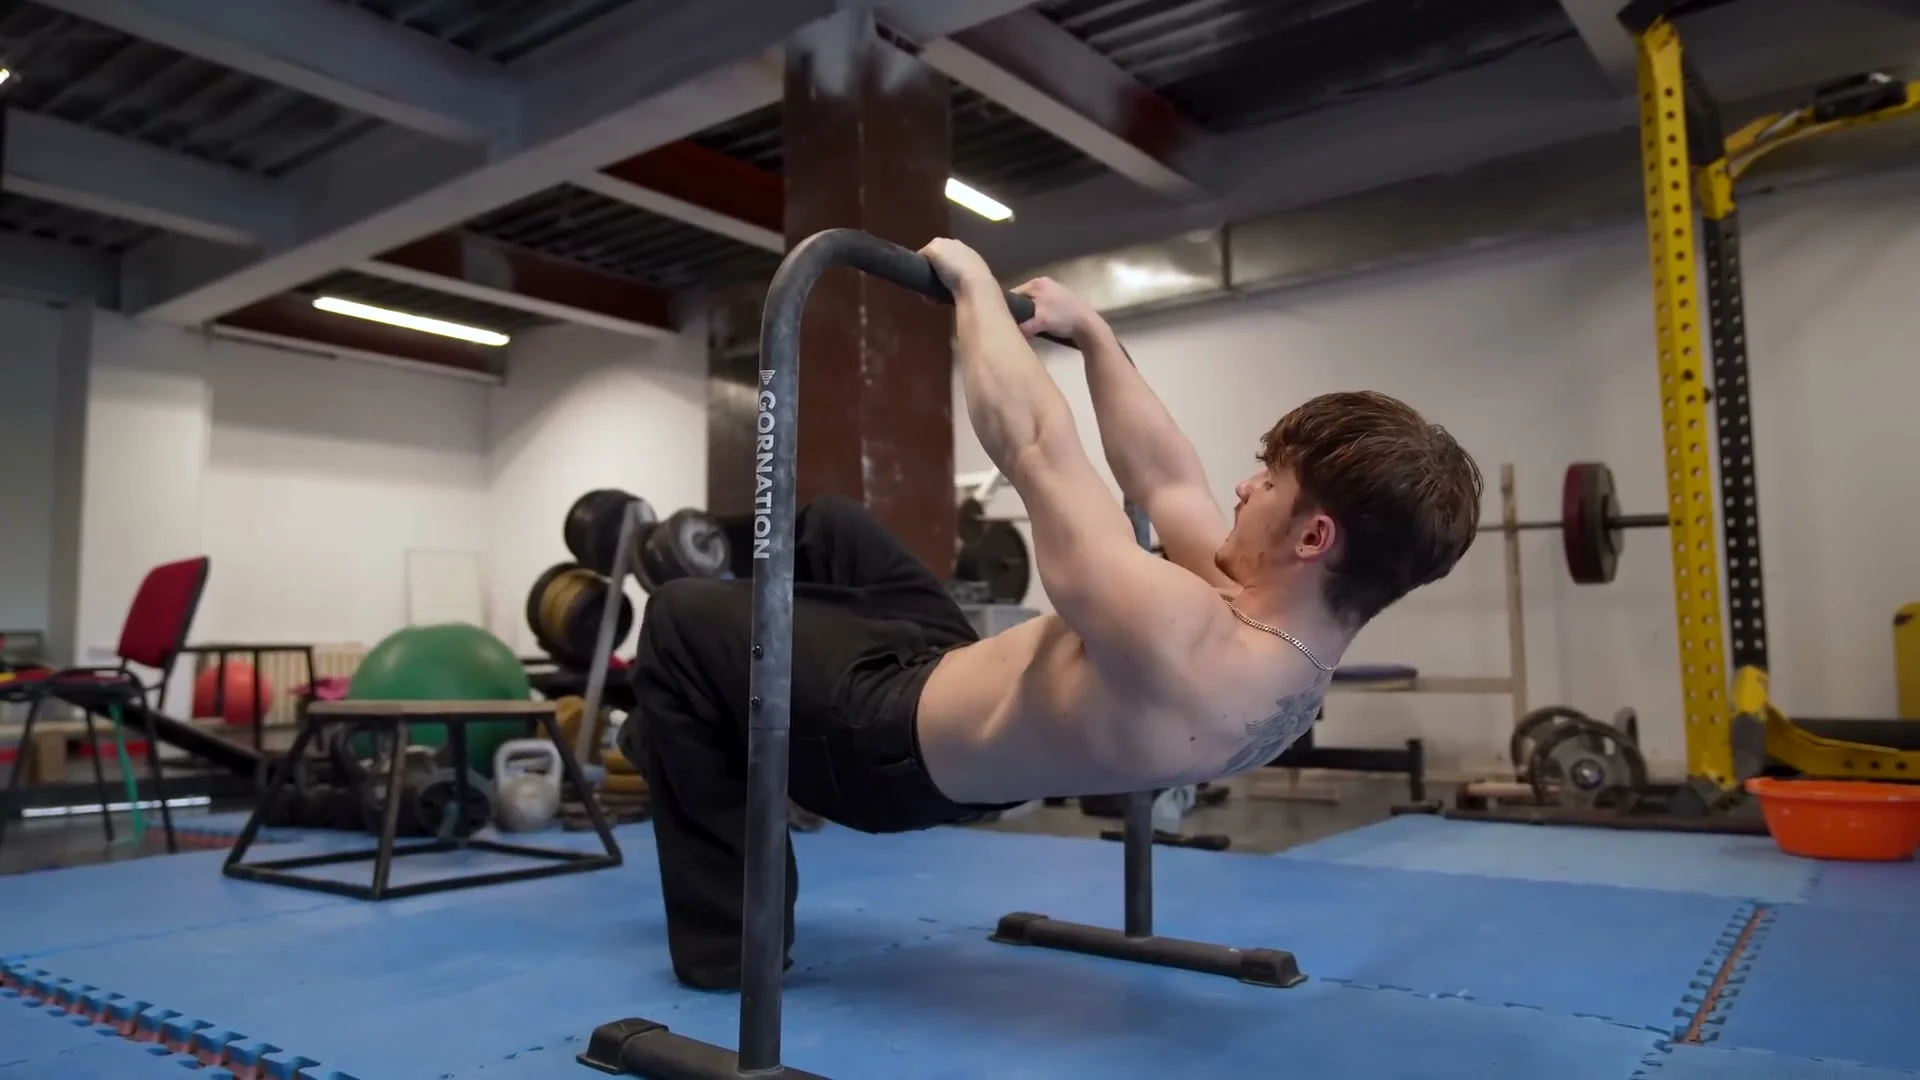
Tip 3: Grip and Tuck Hold Progression
For static holds, use a normal grip. False grip is for front lever pull-ups and touch progressions, not for holds. Keep your scapulas neutral: not fully retracted, not fully protracted. Start with tuck holds and focus on feeling the lat engagement rather than timing the hold.
Once the tuck hold feels controlled, move to tuck pull-ups. You do not need to pull all the way up. A partial range with good lat activation is more useful than a full range with loose form. As the pull-ups improve, gradually increase range of motion until you can touch the bar with your chest.
False grip can come later. It shortens the range of motion during the pull-up by creasing extra skin over the bar, but it adds difficulty to the hold itself. Learn the movements with normal grip first.
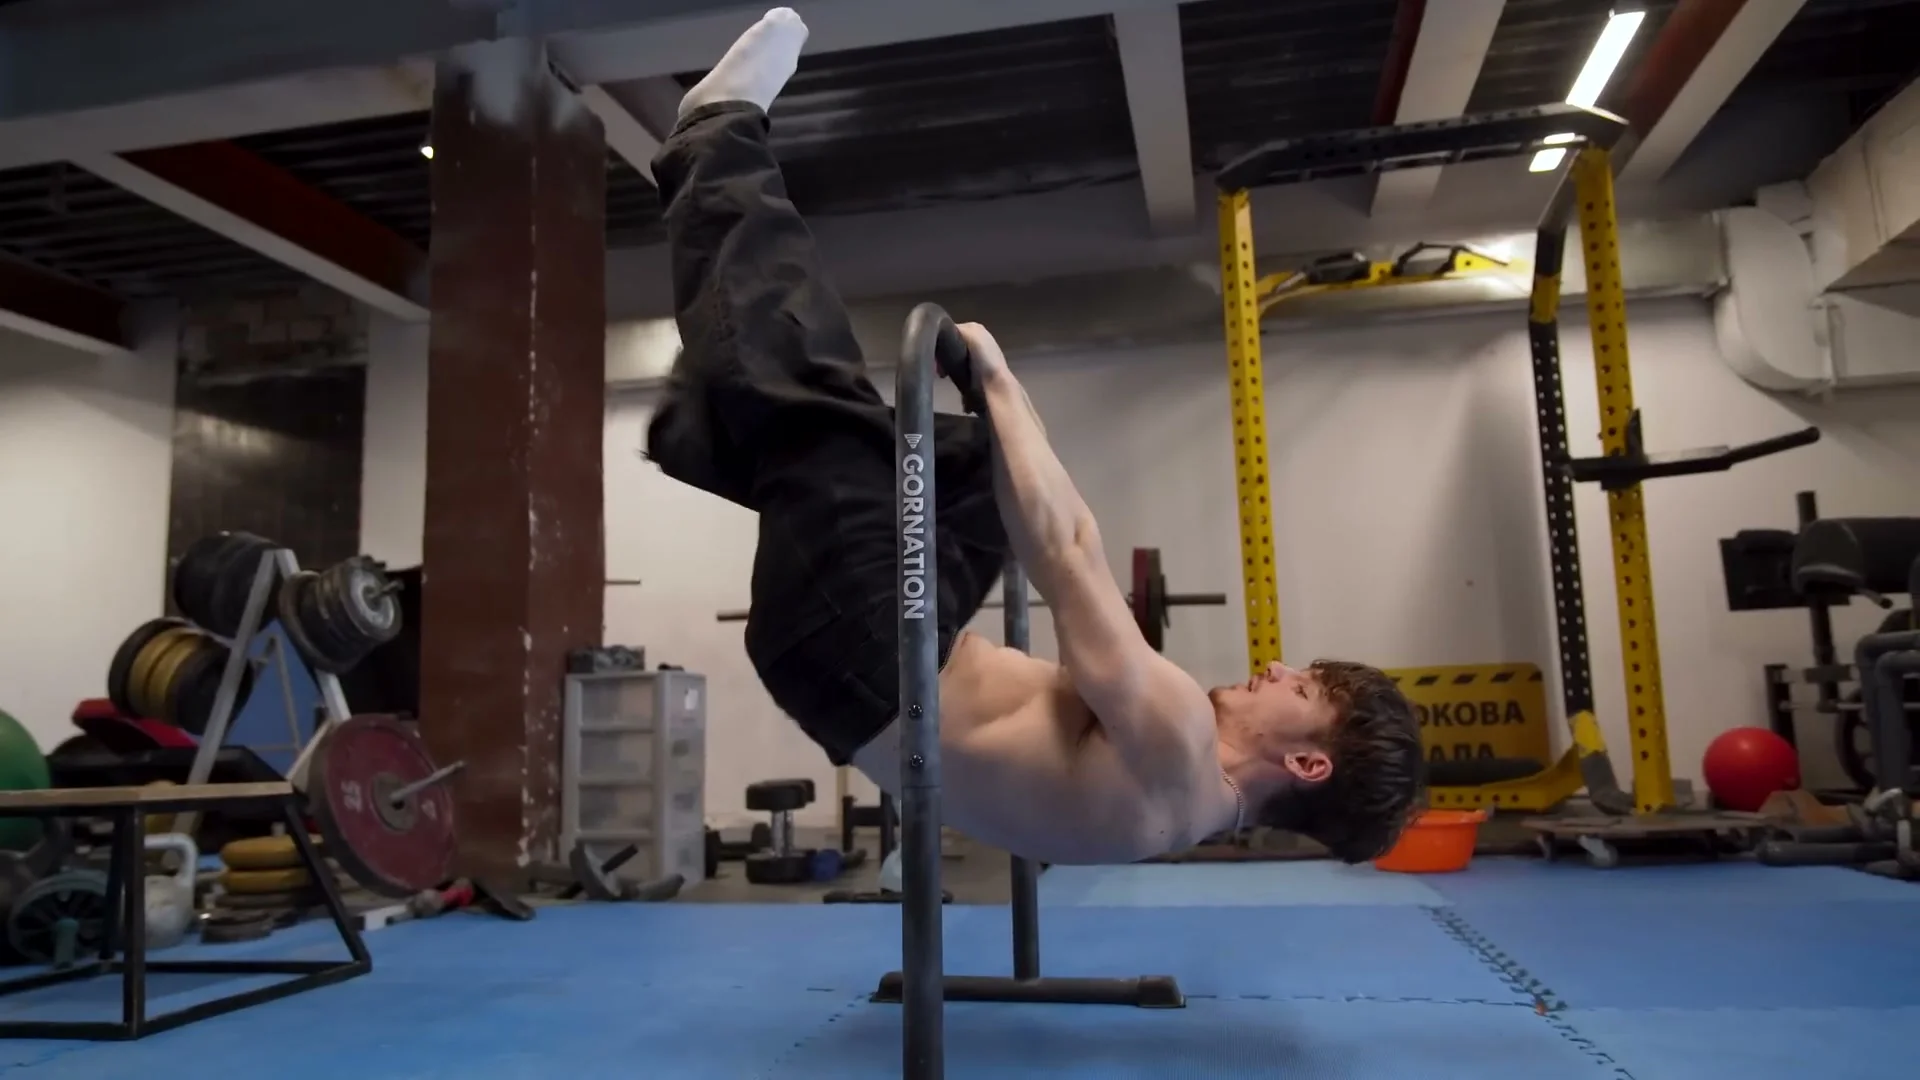
Tip 4: Skip the Straddle. Use the One-Leg Progression.
This is one of Nathan's strongest opinions and it is worth taking seriously. The straddle front lever spreads the legs wide, which opens the hips into a position that is incompatible with a full front lever. You develop a hip pattern that actively works against you when you close the legs. Converting from straddle to full later is more work than it saves.
The one-leg front lever skips this problem entirely. You are already in a proper front lever hip position. It is only slightly harder than the straddle, and the transfer to full front lever is direct. Nathan's recommended progression is: tuck, tuck pull-ups, one-leg, full. If you want an intermediate step between tuck and one-leg, work the tuck-to-full transition rather than adding straddle.
Key Takeaway
Tip 5: Negatives and Lever Raises
Once you can hold a one-leg front lever, add negatives. Kick up to one leg, bring the second leg to full front lever, and lower yourself as slowly as possible. Focus on keeping full lat engagement throughout the descent. Three to five negatives per session is enough to build significant strength.
When you have enough pulling strength, replace the negative-only reps with raises. From a dead hang, initiate the pull toward horizontal. At the top of the press, Nathan adds a specific cue: a small trap retraction motion. Instead of finishing with a pure lat retraction, you include a slight upper trapezius draw at the end of the raise. This keeps the position locked and makes the transition into a hold much more stable.

Tip 6: Breathing and Bracing for Front Lever Pull-Ups
This tip is specifically for front lever pull-ups and front lever to touch. It is advanced but it matters more than most people expect.
The instinct when pulling hard is to exhale and tense. For front lever pull-ups, Nathan recommends the opposite: brace your abdomen before the pull (similar to powerlifting bracing), then inhale as you execute the movement. When you inhale, the muscles of your chest stretch to allow the lungs to expand. That chest stretch produces back retraction. Back retraction produces better front lever form. If you exhale and round the chest, you lose the retraction and the position collapses.
Practice the breathing separately first. Exhale fully, then brace your core without inhaling. Feel the stomach pump out. Then practice combining that brace with an inhale during the actual front lever pull. It takes a few sessions to feel natural but it is one of the more effective technique changes in this set.
Key Takeaway
Bonus Tip: Lean-Forward Tuck Pull-Ups for Beginners
If tuck pull-ups feel impossible, use a lean-forward initiation. Swing slightly forward like the beginning of a muscle-up, let the body momentum carry you, and then pull from that lean position. It is not textbook form, but it gets the first reps moving.
Nathan's broader point here is worth keeping. Build volume first. Form follows volume over time. Worrying about perfect pull-up technique before you have consistent reps will slow you down. Get the reps, get the volume, then clean up the technique as the movement becomes familiar. Nathan trained seven years to reach his level. Allow yourself to do ugly reps in the early stages.
Common Mistakes
Using the Straddle Instead of One-Leg
The straddle feels like a logical intermediate step between tuck and full. But it opens the hips into a wide external rotation that does not exist in the full front lever. Athletes who spend months in straddle often develop a hip habituation to that open position, and closing the legs later requires relearning the hip alignment from scratch. One-leg is the direct path.
Exhaling During the Pull
Exhaling during a hard effort feels right because it is what we do during most exercises. In front lever pull-ups it actively hurts the position. Exhaling contracts the chest and rounds the upper back, which collapses the retraction that holds the body horizontal. Brace and inhale instead.
Ignoring Lat Activation Drills Before Training
Jumping straight into holds without activating the lats first means training with a muscle group that is not switched on. The scapular retraction drill at the bar and the elastic band drill both prime the lat before loading it. Skipping them consistently produces stalls in progress that have nothing to do with strength.
Posterior Chain Tension Bending the Knees
When a beginner holds any front lever variation, the posterior chain contracts hard. The hamstrings, glutes, and lower back shorten, and the knees bend. Nathan fixes this with a simple cue: activate the quads. Stomping the legs and thinking about straightening the knees actively counteracts the posterior chain contraction and keeps the body line clean.
Training Tips
Front lever holds are best trained at the start of a session, before fatigue. Do two to three max hold attempts with full recovery between each. These tell you where your limit is on that day and they build the most direct strength for the hold.
Negatives and raises should follow the holds, not precede them. Doing negatives first fatigues the lats before you get a clean measure of your hold capacity.
Pressing strength directly improves front lever. Any vertical pushing or horizontal pushing that loads the lats at full extension transfers to the hold. Do not neglect pushing work if your goal is front lever progress.
Track your hold times. Write them down after each session. Progress in front lever is slow, and without written records it is easy to miss the small improvements that accumulate over weeks. Three seconds this week, five seconds next week, eight seconds the week after: those are real gains even if they do not feel dramatic in the moment.
Give the technique changes time to integrate. The breathing cue, the trap retraction at the top of the raise, and the scap warmup routine all take several sessions before they become automatic. Do not judge a new technique after one attempt.
Frequently Asked Questions About the Front Lever
How long does it take to learn the front lever?
There is no fixed timeline. Most athletes with a strong pull-up base (10 to 12 clean reps) reach a tuck front lever within two to three months of specific training. The one-leg front lever typically takes another three to six months. The full front lever can take one to two years of consistent practice depending on starting strength and training frequency.
Is the straddle front lever useful for progression?
Nathan Bosech advises against it. The straddle opens the hips into a rotation that does not exist in the full front lever, and athletes who spend significant time in straddle often need to unlearn that hip pattern before the full position clicks. One-leg front lever is a better intermediate step and transfers directly to the full movement.
What muscles does the front lever work?
The front lever is primarily a lat exercise. It also demands strong core engagement across the entire anterior chain, scapular retractor strength, and shoulder stability under a horizontal pulling load. The lats work in a stretched and loaded position, which is why the front lever builds significant pulling strength even though it is a static hold.
Do I need rings or a bar for front lever training?
A straight pull-up bar is the best tool for learning the front lever. Rings add instability that makes the position harder to hold and learn. Once the full front lever is established on a bar, rings are a useful challenge for more advanced training.
How many times per week should I train the front lever?
Two to three sessions per week is a standard approach. Front lever training loads the lats, shoulders, and core heavily, and full recovery between sessions matters more than frequency. Three sessions per week works well when the volume per session is kept reasonable: two to three max holds, three to five negatives or raises, and the activation drills.
What is false grip and when should I use it for front lever?
False grip wraps extra skin over the bar by reaching farther than a standard grip, which creases the wrist and shortens the pull-up range of motion. Nathan recommends using it for front lever pull-ups and touch work, not for static holds. For holds, false grip adds wrist fatigue without benefit. Learn the hold with normal grip first.
Can I train front lever if I cannot do 10 pull-ups yet?
Not effectively. The front lever requires more lat strength than most athletes develop before reaching 8 to 10 clean pull-ups. If you are below that baseline, front lever attempts will be mostly frustration. Build pull-up volume first, then add the activation drills from tip 1 and tip 2 as you approach the threshold. You will be ready sooner than you expect.
Daniel Flefil
Calisthenics coach with 11 years of experience, co-founder of Calixpert, and organizer of Beast of the Barz, one of the world's largest calisthenics competitions. Based in Stockholm. I write about training, equipment, and everything that goes into building a serious calisthenics practice.
More about Daniel →