Daniel Flefil
August 11, 2022 · 6 min read
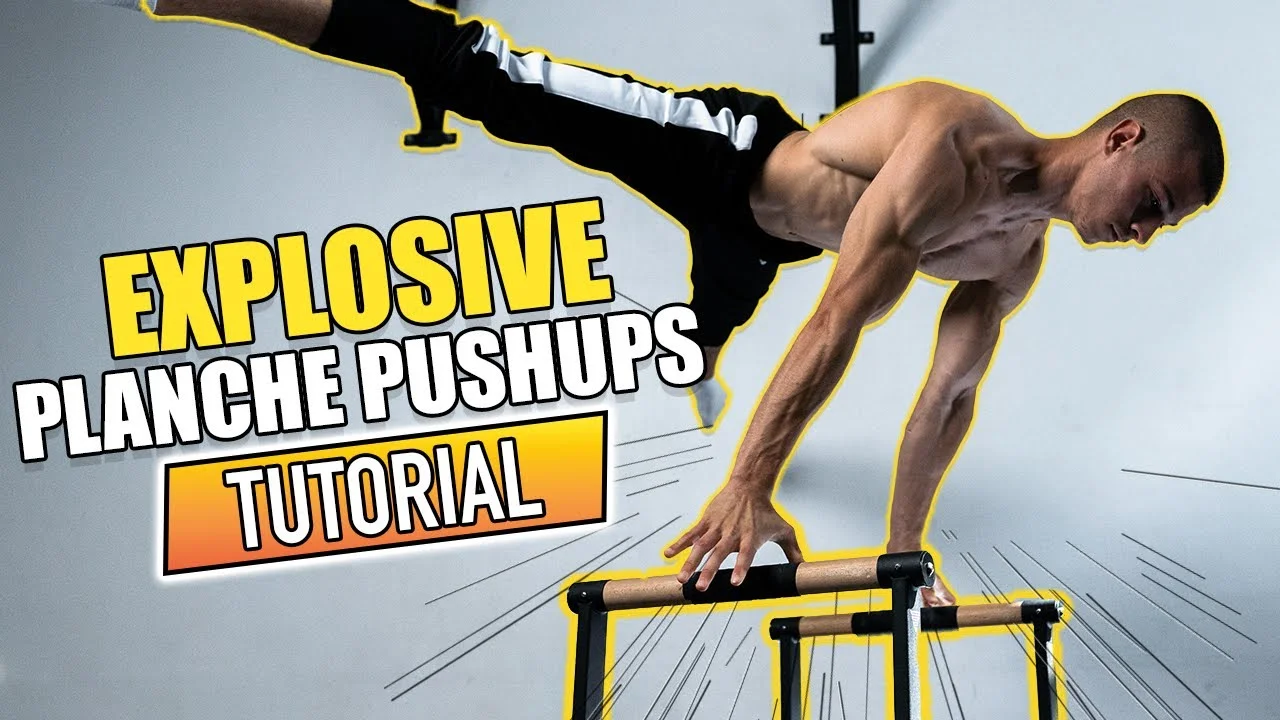
The explosive planche push-up is one of the most visually striking skills in calisthenics. Getting off the ground from a planche lean or tuck planche position requires a combination of strength, timing, and specific training that most athletes overlook. For this video I trained with Daniel Hristov, world champion in calisthenics, and he shared the three tips he uses to build explosiveness in the planche push-up. These are not general fitness tips. Each exercise targets the exact quality that makes the push explosive rather than just strong.
Watch the Full Tutorial
What Are Explosive Planche Push-Ups?
An explosive planche push-up is a push-up performed from a planche lean or tuck planche position where the push phase is fast enough to lift the hands off the ground or generate visible power at the top. The skill combines the shoulder positioning of the planche with the power output of an explosive push. The goal is not to push quickly through many reps. It is to produce maximum force on each individual rep.
The same three setup cues from planche training apply here: wrist in the middle, elbows locked, biceps and elbows facing forward. The grip and elbow position are not optional. They determine how the power transfers through the push. Getting these wrong means the push loses efficiency regardless of how strong the athlete is.
The Core Principle: Slow Down, Fast Up
The principle behind all three tips is the same: go down slowly, push up as fast as possible. This is not about how many reps can be completed. It is about how explosive each push is. Too much volume or too much speed in the lowering phase leads to fatigue that kills the explosive output on the way up.
Hristov is direct: if you do too many sets with too many reps, you stop progressing in explosive push-ups. The training stimulus for explosiveness requires fresh muscles, adequate rest, and focused power output on each push. Low reps, full recovery.
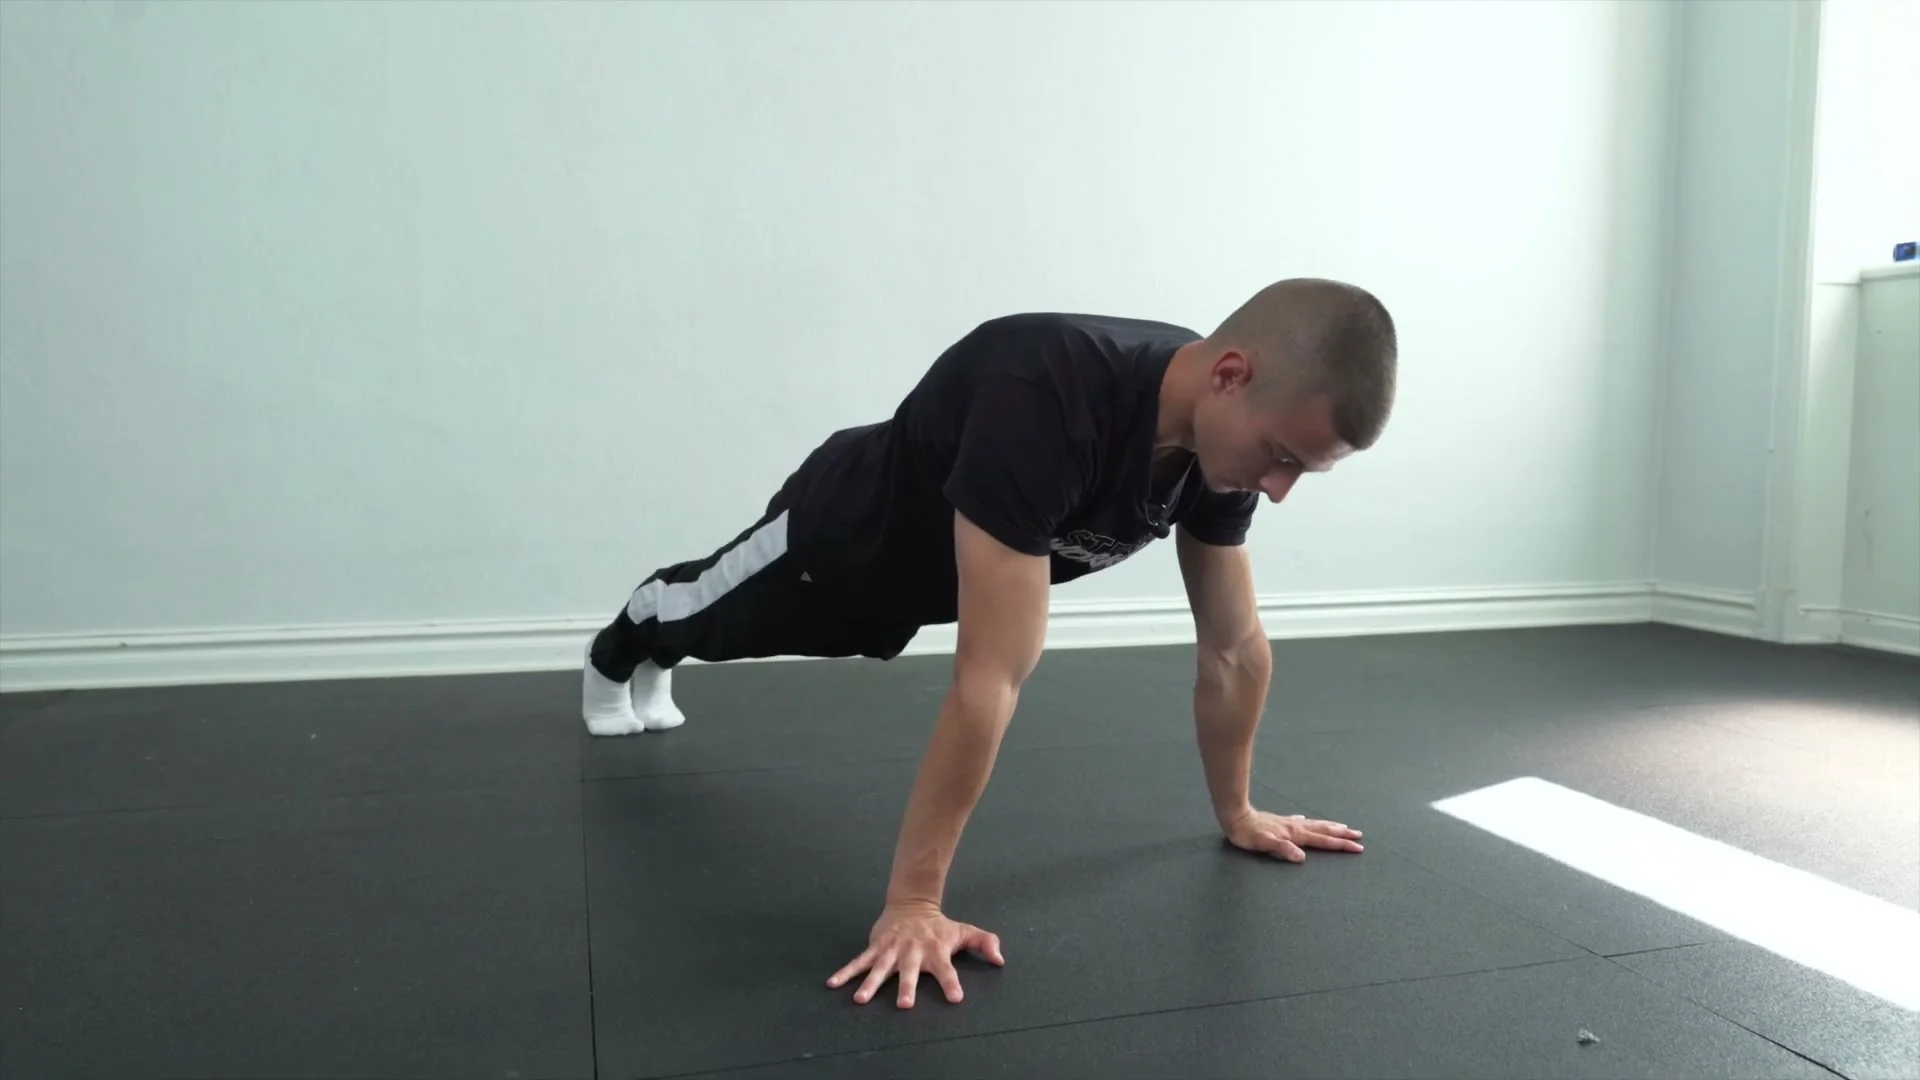
Tip 1: Normal Explosive Push-Ups
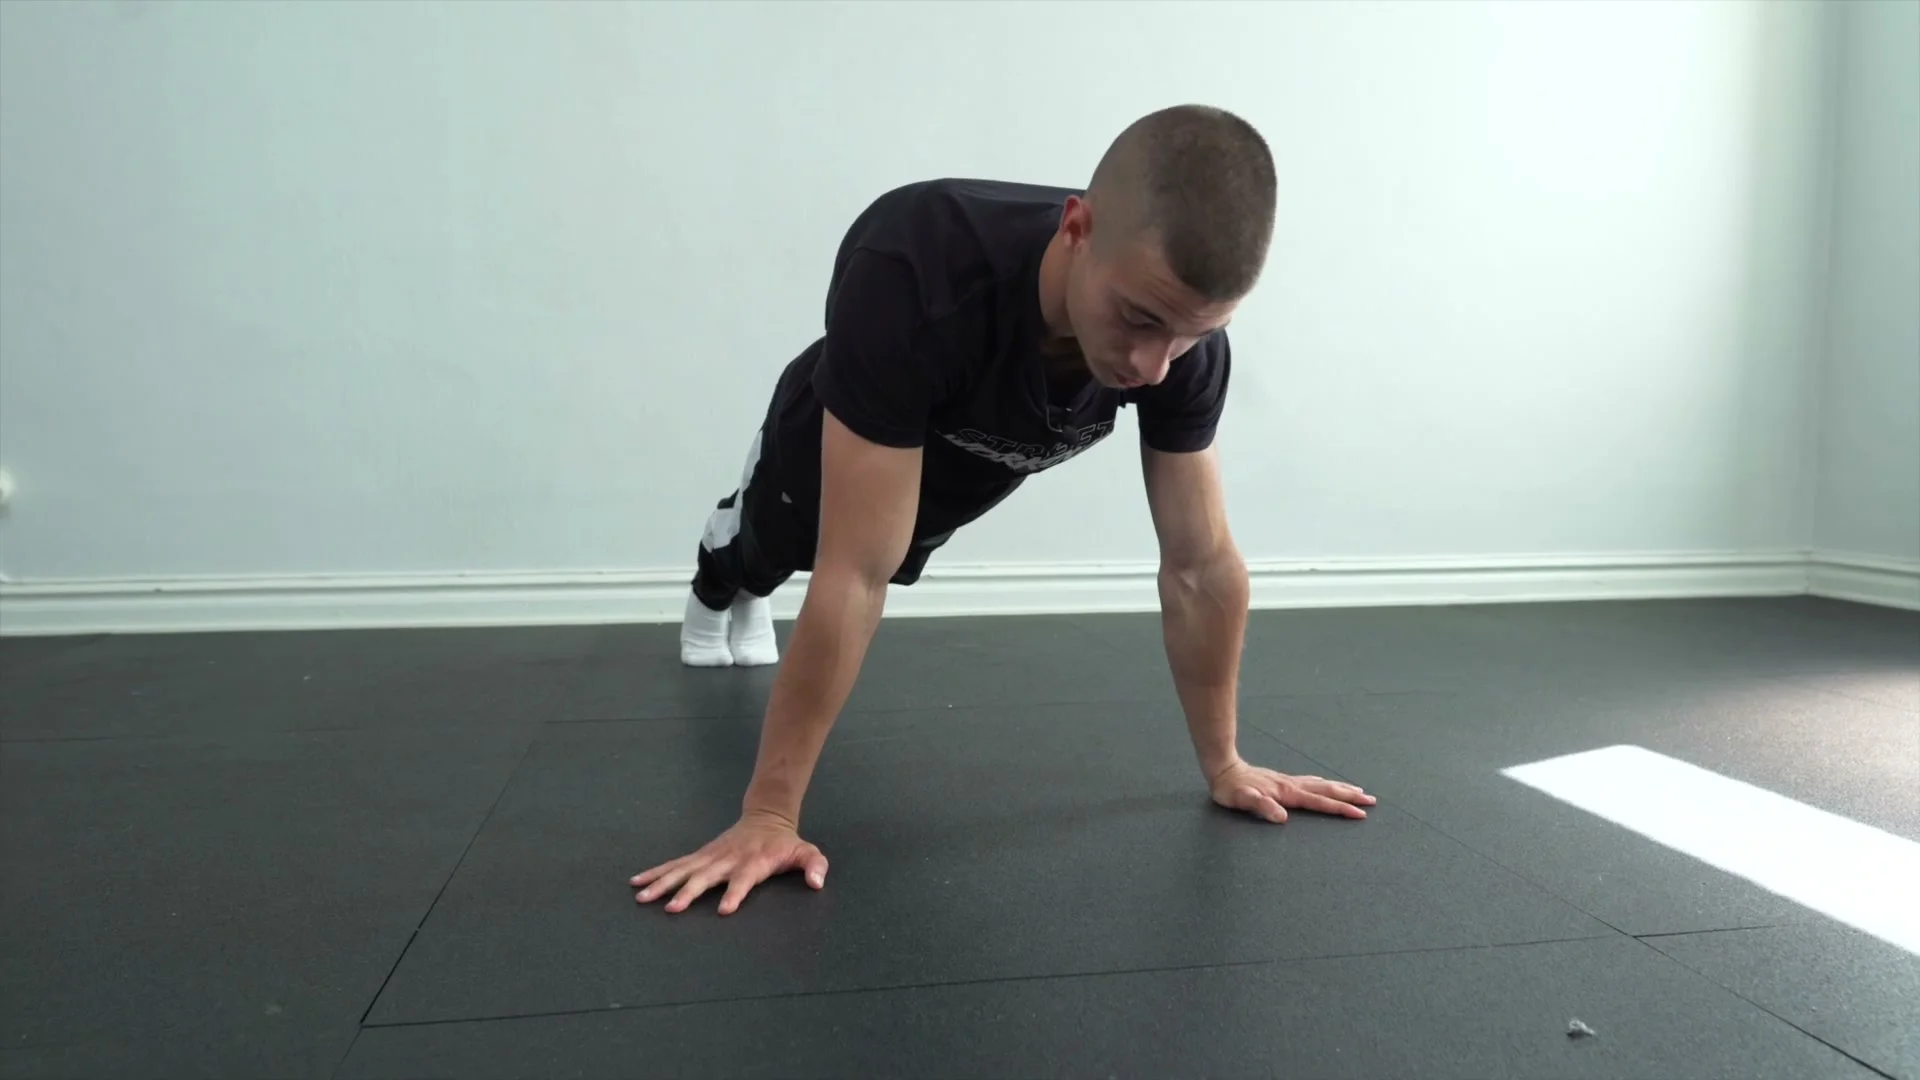
The first tip is normal explosive push-ups, either on the floor or on parallettes. Start in a straight body line with a forward lean. Elbows and biceps face forward. Wrist in the middle. Start the first rep slowly to confirm the position, then push with maximum force on the way up.
If jumping from the push-up is possible, Hristov adds it as a progression: push hard enough that the hands leave the floor at the top. This is the target for this tip. Whether jumping is achievable or not, the push must be as explosive as possible on every rep.
Feet can be flat on the floor or elevated. The elevated version changes the lean angle and makes the exercise harder. Use the flat version first. Add elevation once the flat version is consistently explosive.
Key Takeaway
Tip 2: Planche Lean Push-Ups With Resistance Band
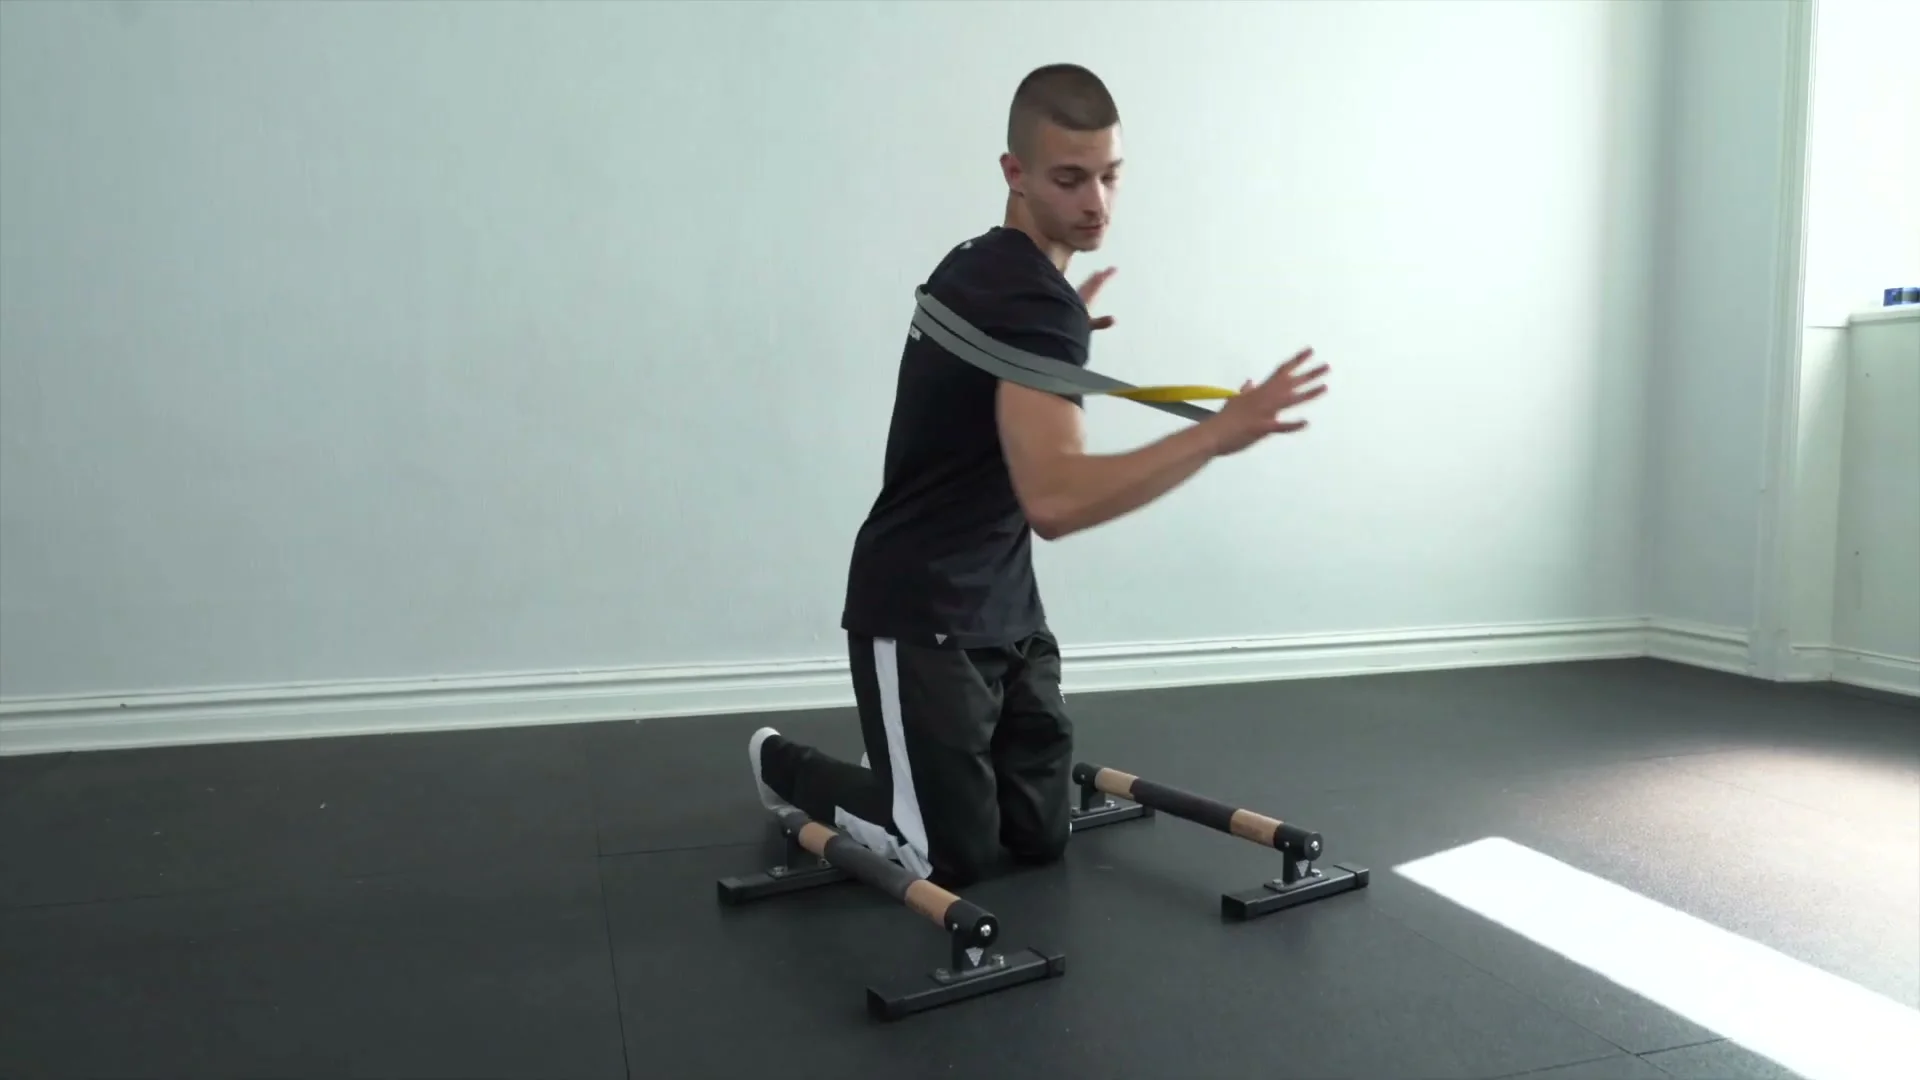
The second tip is planche lean push-ups with added resistance. The preferred tool is a weight vest. When a vest is not available, a resistance band looped across the back and anchored to the parallettes is an effective substitute. The band adds load on the push without changing the body position.
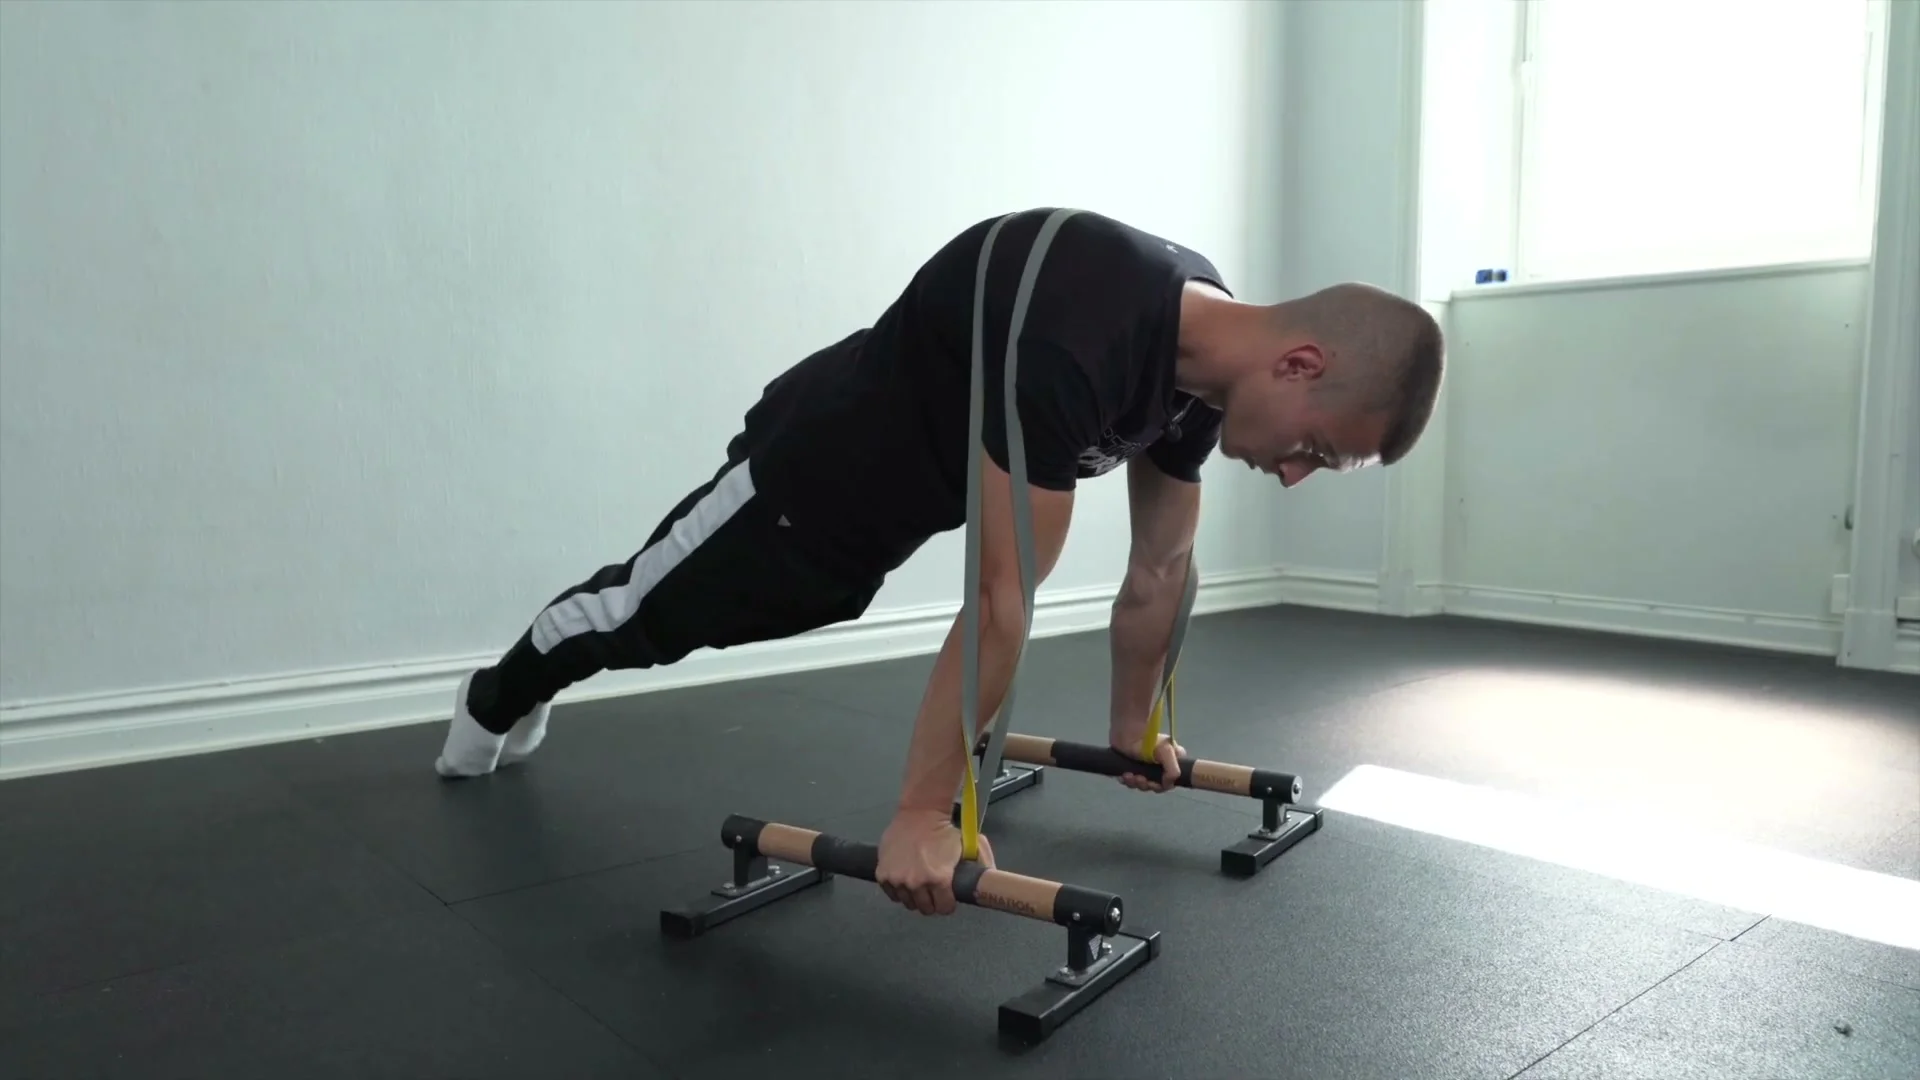
The setup: check the body line from the lean position before starting. The lean is moderate, not maximal. Elbows locked, biceps facing forward, wrist in the middle, hip slightly down.
One specific adjustment for the banded version: do not apply full protraction at the bottom of the push. With the band adding load across the back, protraction at the bottom creates excess pressure. Lower without full protraction, then add protraction and hip engagement at the top of the push. This timing difference protects the shoulder at the loaded bottom position while still training the protraction that planche requires.
Tip 3: Tuck Planche Push-Ups

The third tip is tuck planche push-ups. This is the hardest of the three. Hristov recommends starting with this tip early in the session rather than at the end, because fatigue from tips one and two makes it significantly harder.
Setup: wrist in the middle, elbows and biceps facing forward. Start with a small amount of protraction before entering the tuck. Bring the knees close to the abs and hold. The hip stays in the middle range, not dropped low or pushed high. Feeling where the body is in this position is difficult. Hristov acknowledges that even experienced athletes lose awareness of their hip position in the tuck. Do not overthink it. Set the position as close to the middle as possible and push.
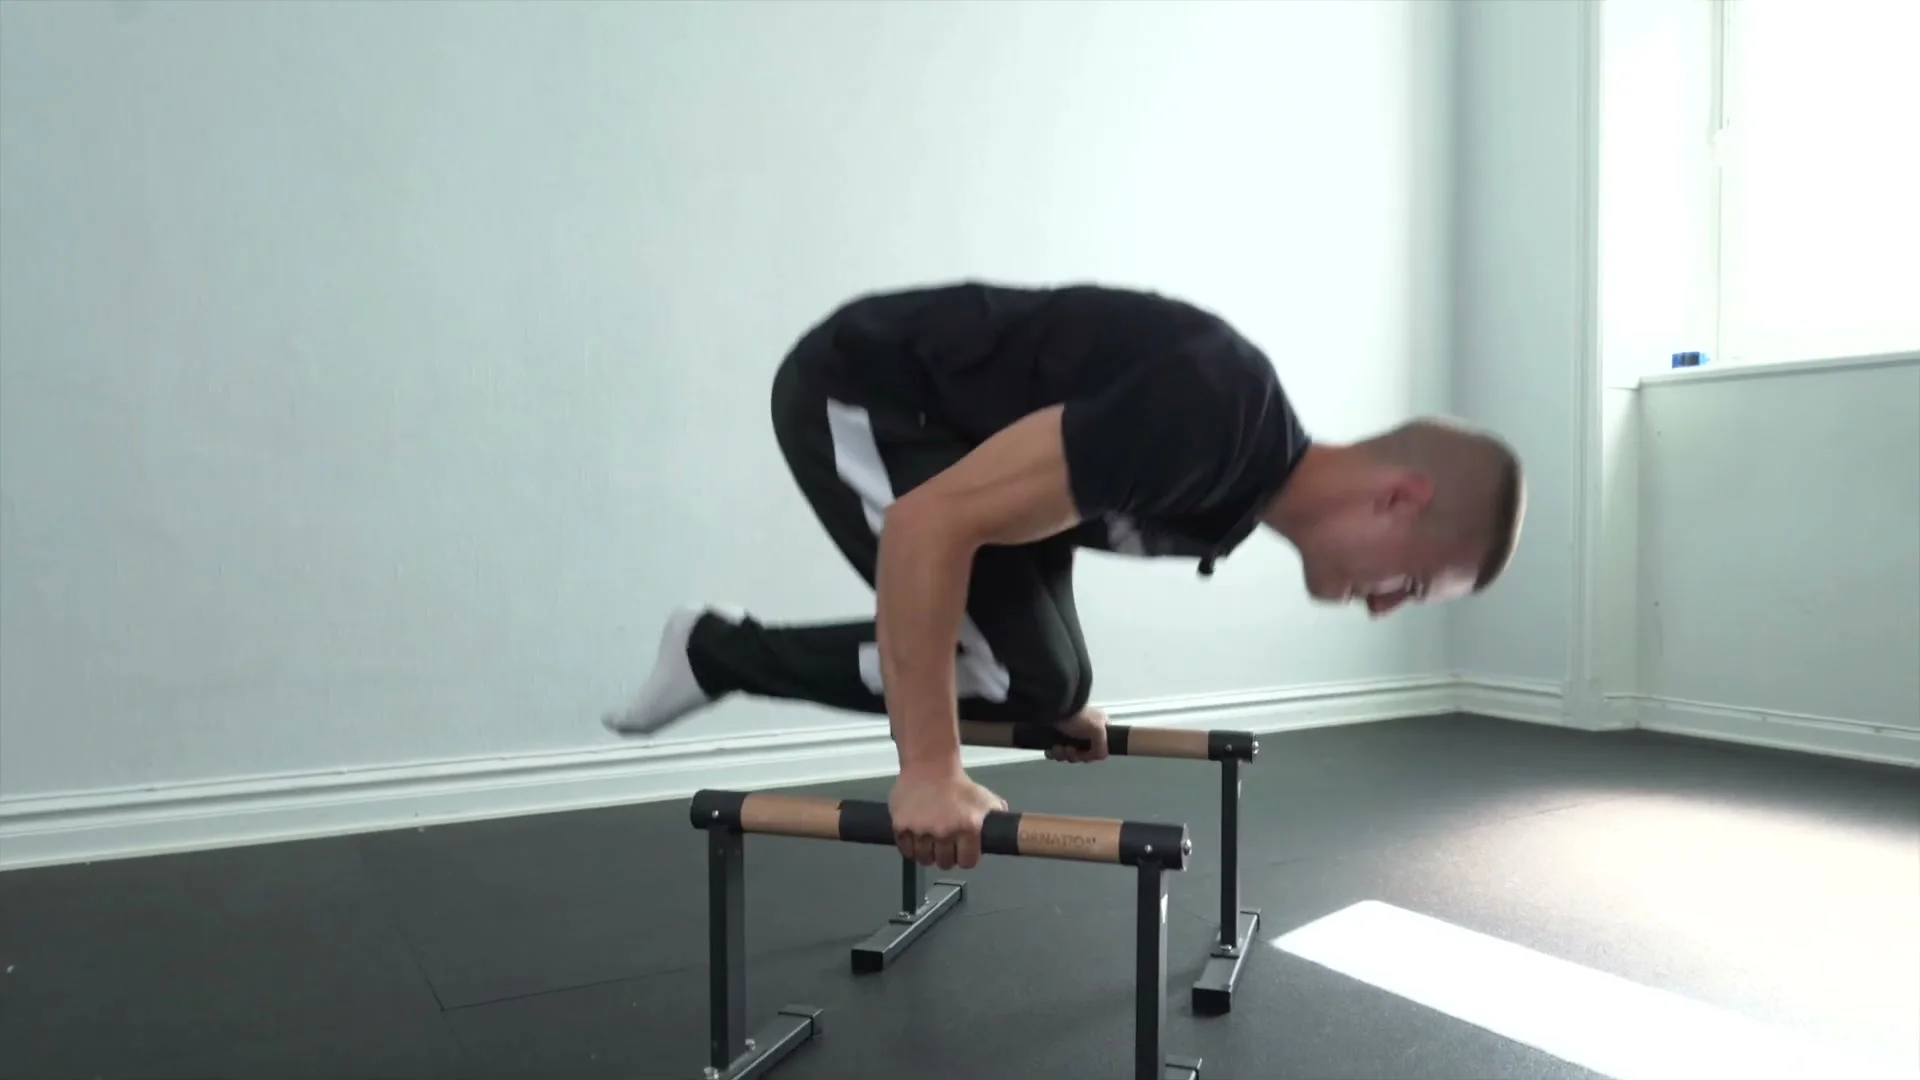
The movement: lower slowly, push up as fast as possible. The tuck planche push-up has no momentum advantage. Every rep starts from a dead position. The slow descent loads the shoulder and scapula fully. The fast push has to overcome that load from zero. This combination is what makes it the hardest of the three tips.
If weight vest or band is unavailable, do the tuck planche push-up without any added load. Add more reps in that case. The unweighted version is still a demanding exercise.
Sets, Reps, and Rest
The protocol is specific and should not be improvised.
Tip 1 (normal explosive push-ups): Three sets of three to five reps. Rest two to three minutes between sets. For the last one or two sets, four to five minutes is acceptable.
Tip 2 (lean push-ups with resistance): Three to five sets. Same rest protocol as tip one.
Tip 3 (tuck planche push-ups): Two to four reps per set. Rest four to six minutes between sets. This is the most demanding of the three and requires the most recovery between sets. Do not reduce rest below four minutes to save time. The quality of the push drops immediately with under-recovered muscles.
The principle across all three: reps are limited on purpose. Exceeding the rep range means the muscle group producing the explosive push is no longer fresh. Fatigued explosive training produces slow training. That is the opposite of the goal.
Training Tips
Run these three tips in the order Hristov presents them. Tip one builds the base explosive pattern. Tip two adds load to that pattern. Tip three applies the pattern to a planche-specific position. Jumping to tip three without tip one and two leads to poor technique under load.
Parallettes are the better surface for tips two and three. The floor is acceptable for tip one, but the wrist load in extended wrist positions accumulates over time. Parallettes reduce that risk.
Do not judge progress session by session. Explosive training takes weeks to manifest visible change. Compare the quality of the push at four weeks versus week one, not session three versus session two.
If the jump in tip one feels impossible at first, it is not the goal on day one. The goal is to push as hard as possible on every rep. The jump comes from accumulated explosive strength. Push hard, recover, push again.
Frequently Asked Questions About Explosive Planche Push-Ups
Do I need to already have a tuck planche for tip three?
Yes. The tuck planche push-up requires holding the tuck planche position before adding the push component. If the tuck planche hold is not yet stable for a few seconds, build that first before attempting the push. Tips one and two can be trained while the tuck planche hold is still developing.
Why should I not do more than five reps for explosive push-ups?
Explosive output requires fresh muscles. After five or six reps at full effort, the fast-twitch muscle fibers producing the explosive push are fatigued, and the remaining reps become slow. Slow reps in an explosive training session train the wrong quality. Keep reps low, rest fully, and keep every rep fast.
Can I use the floor instead of parallettes for tips two and three?
Tips two and three can be done on the floor, but the wrist position in full extension adds discomfort and injury risk over time, especially with added resistance in tip two. Hristov demonstrates both in the video. Parallettes are recommended for any session involving repeated lean push-up work.
Why is protraction handled differently in tip two with the band?
The resistance band across the back adds direct load against protraction at the bottom position. Applying full protraction while the band is pulling against it creates excess shoulder pressure. Lower without full protraction, then add protraction at the top where the band tension is lower. This protects the shoulder at the loaded position without removing the protraction training entirely.
What is the correct hip position in the tuck planche push-up?
The hip stays in the middle range: not dropped low toward the floor, not lifted high. Hristov acknowledges that proprioception in the tuck position is difficult for most athletes. Film from the side to check hip position rather than trying to feel it during the rep.
How long before the explosive push-up is consistent?
Several weeks of consistent, low-rep, high-quality training. The timeline depends on the starting strength level. Athletes who already have a strong straddle or tuck planche tend to see faster results from explosive training because the base strength is already there. The explosive quality builds on top of existing strength. Without adequate base strength, build that first.
Should I do all three tips in one session?
Yes, in order. Hristov presents them as a single session program. If tip three is too difficult to include at first, run tips one and two and work tip three in gradually. Running all three in one session is the intended structure and produces the most transfer between the exercises.
Daniel Flefil
Calisthenics coach with 11 years of experience, co-founder of Calixpert, and organizer of Beast of the Barz, one of the world's largest calisthenics competitions. Based in Stockholm. I write about training, equipment, and everything that goes into building a serious calisthenics practice.
More about Daniel →